 It's a beauty: The Drop CTRL keyboardIljitsch van Beijnum
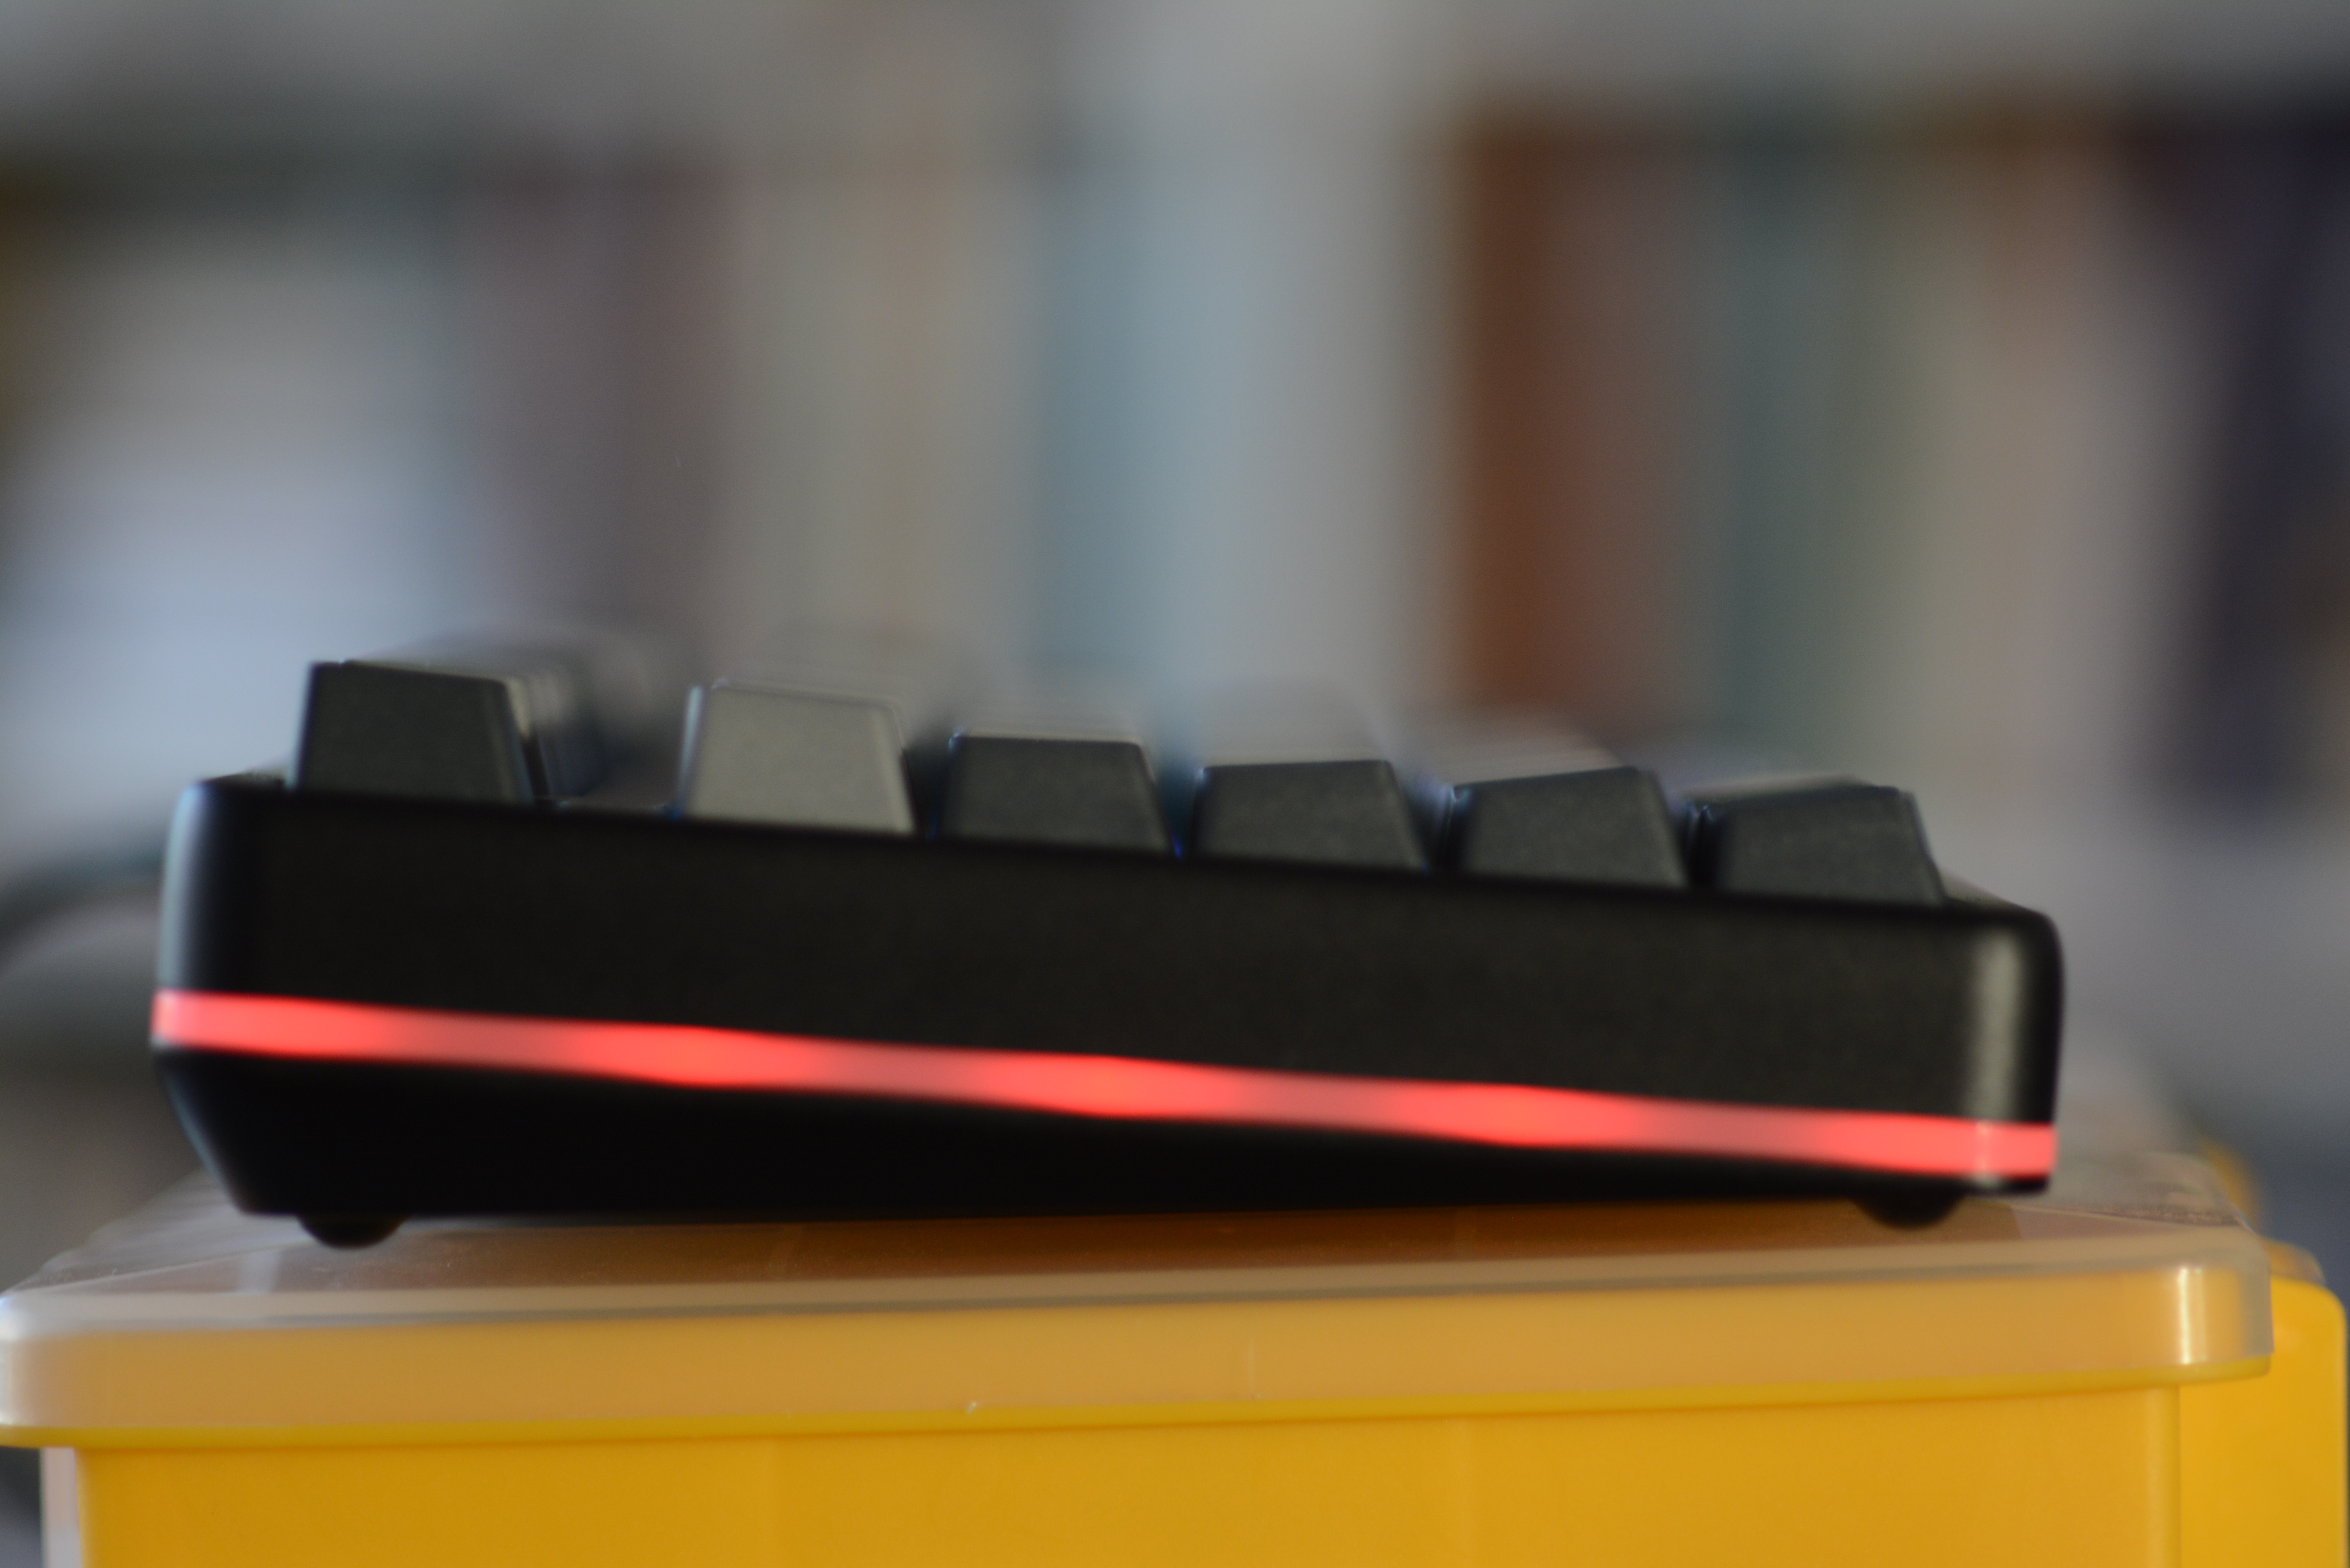 As seen from the left...Iljitsch van Beijnum
 Closer. Closer.Iljitsch van Beijnum
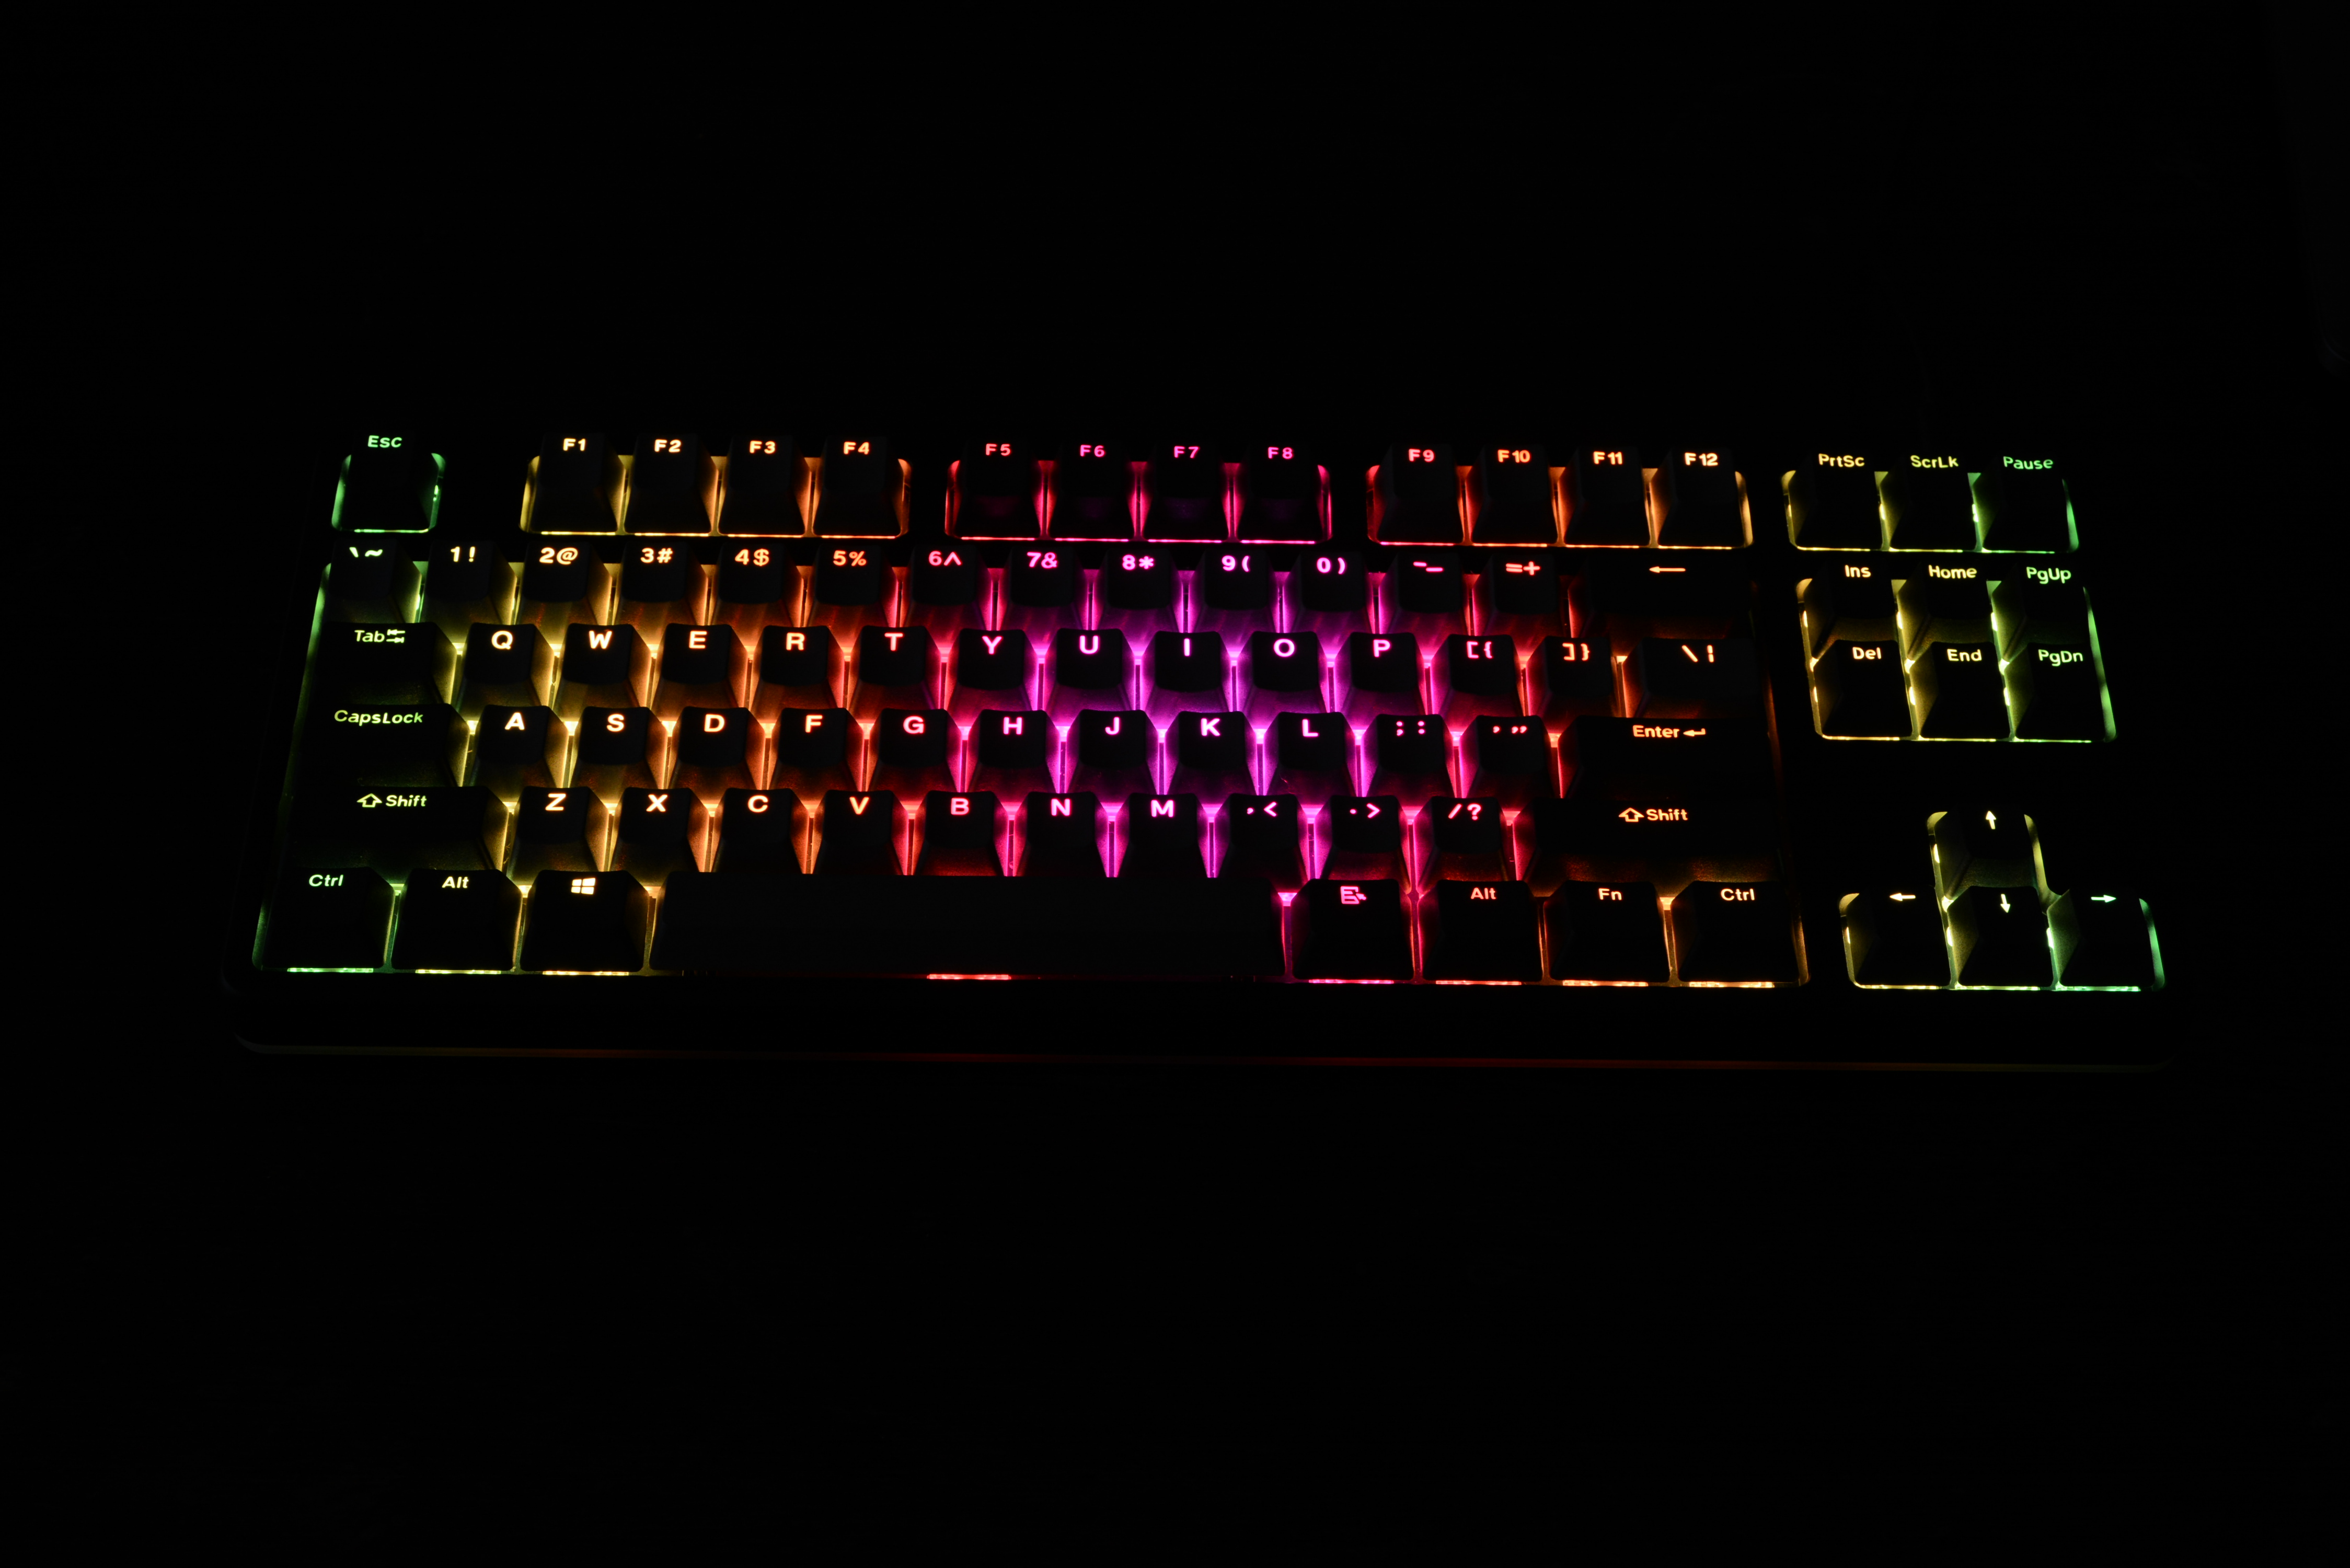 Even though it's a customizable pre-built (versus a total custom job), you can of course change the aesthetic of the Drop CTRL...Iljitsch van Beijnum
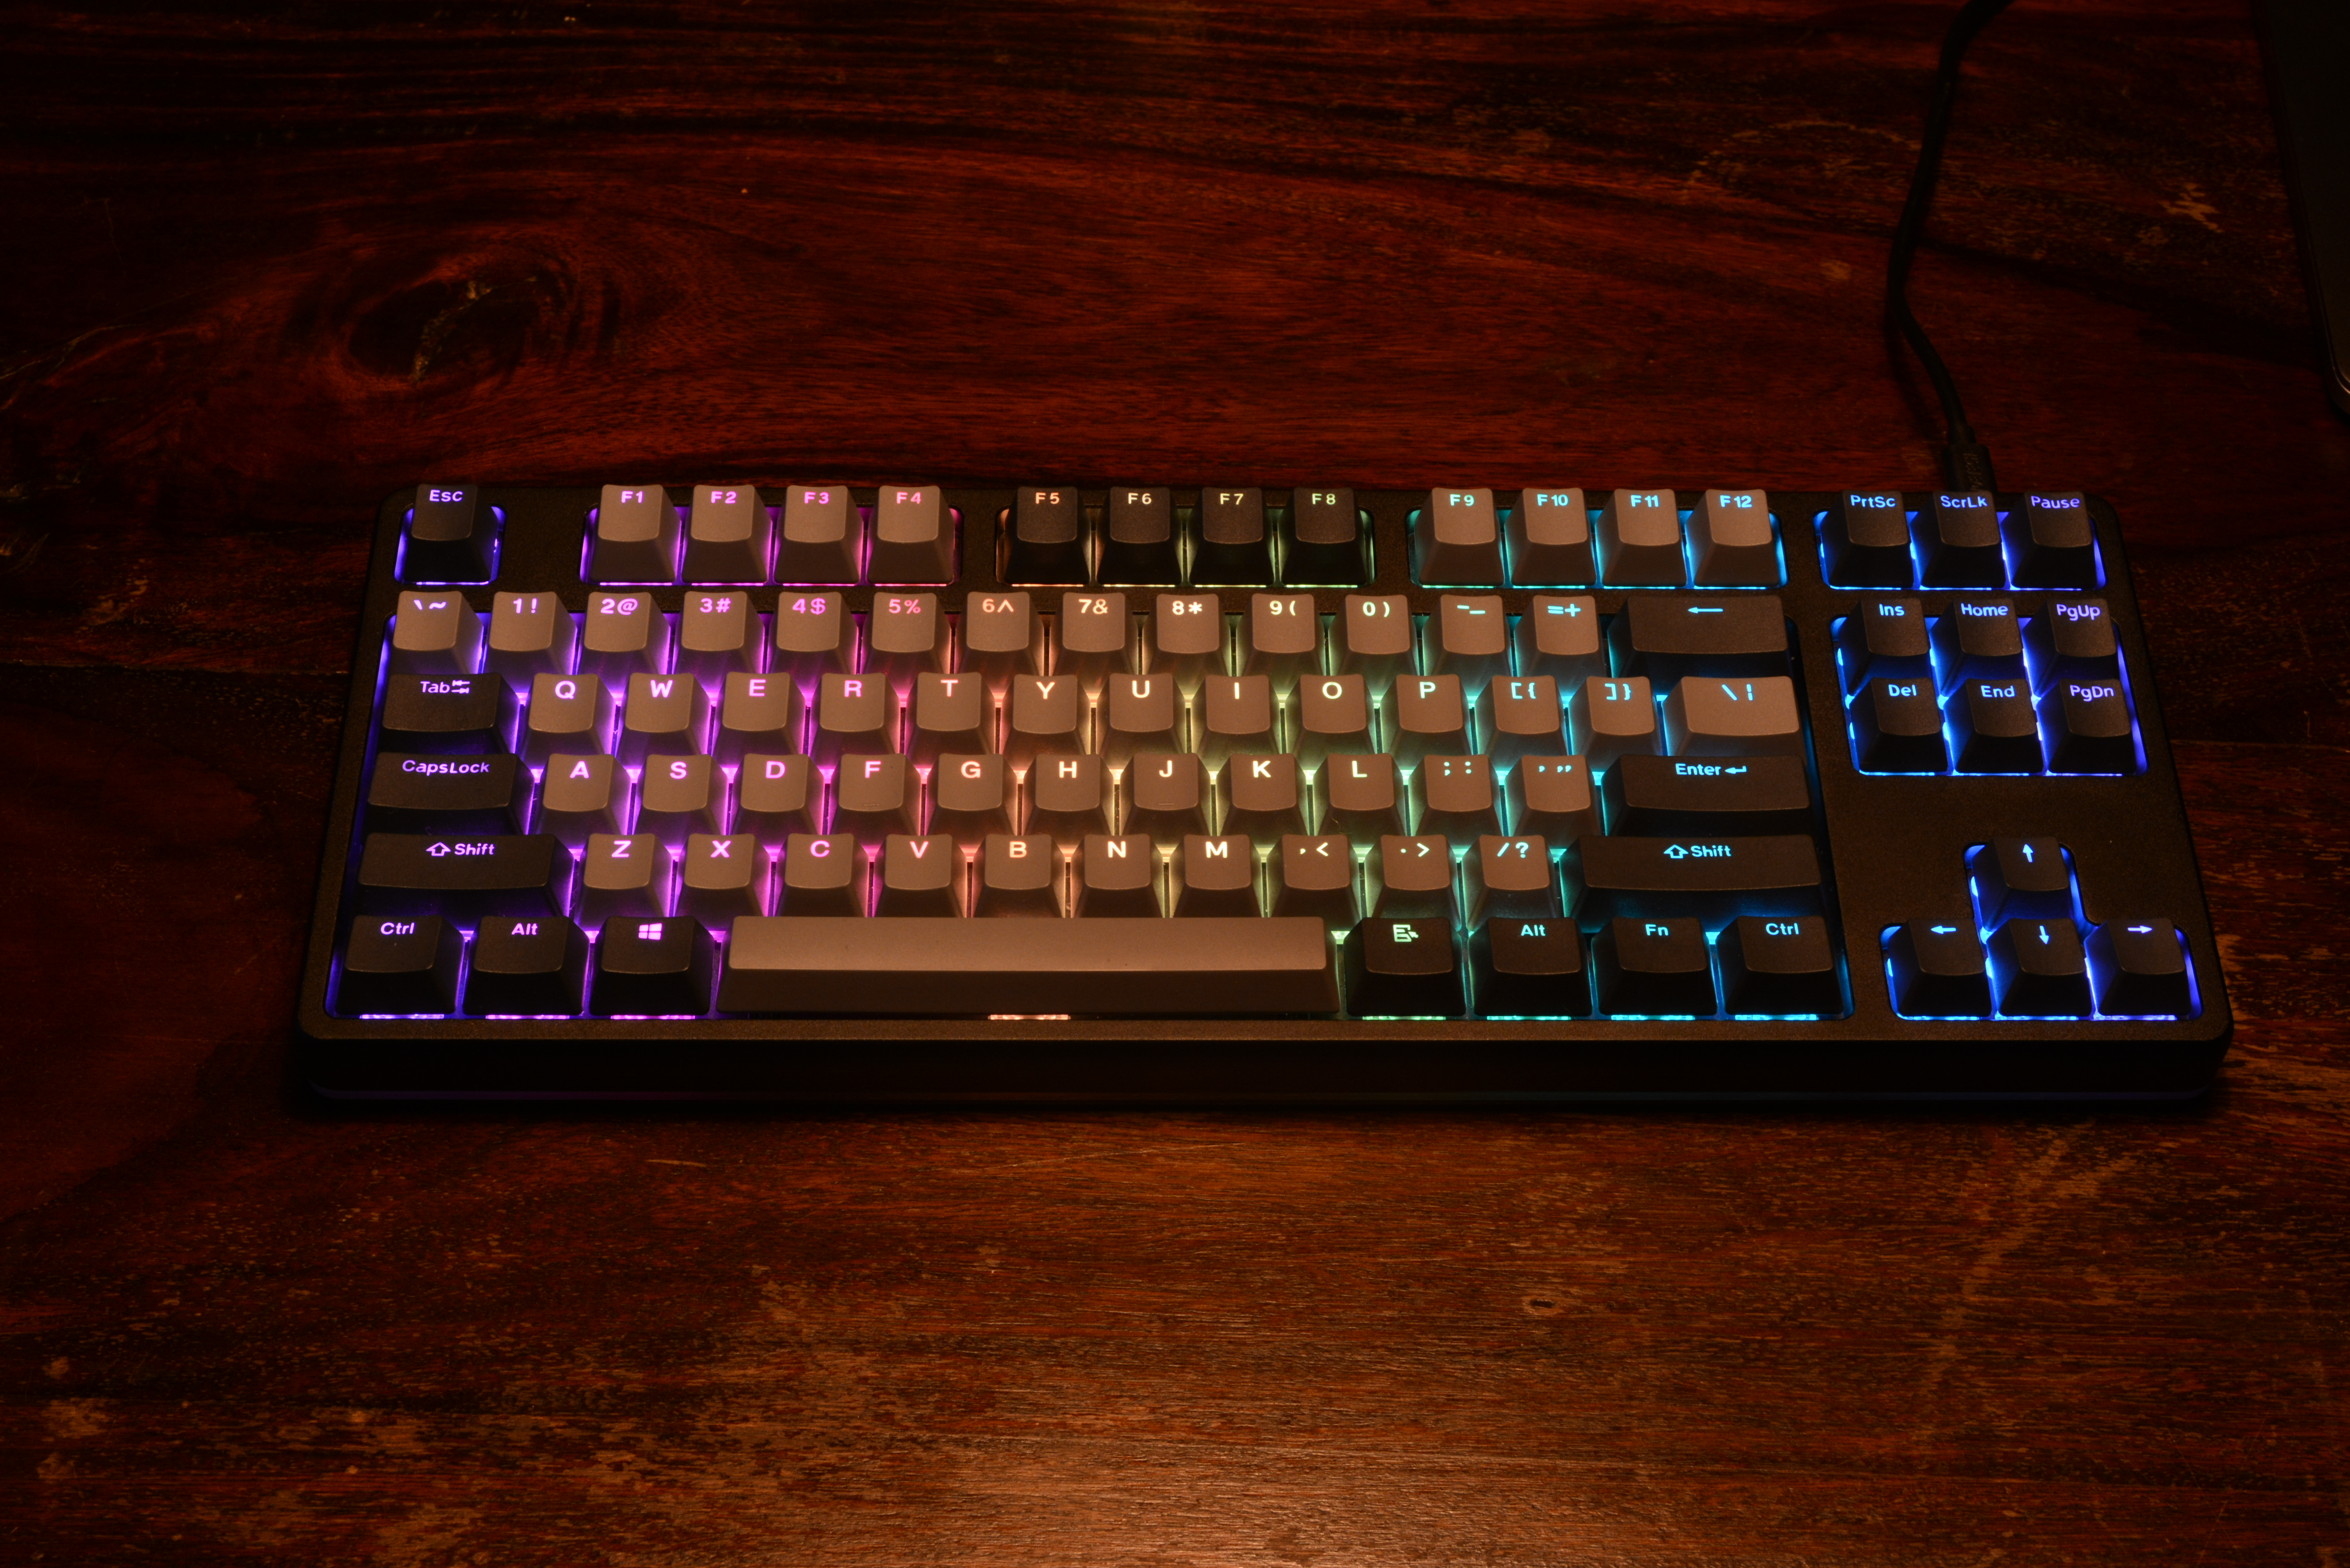
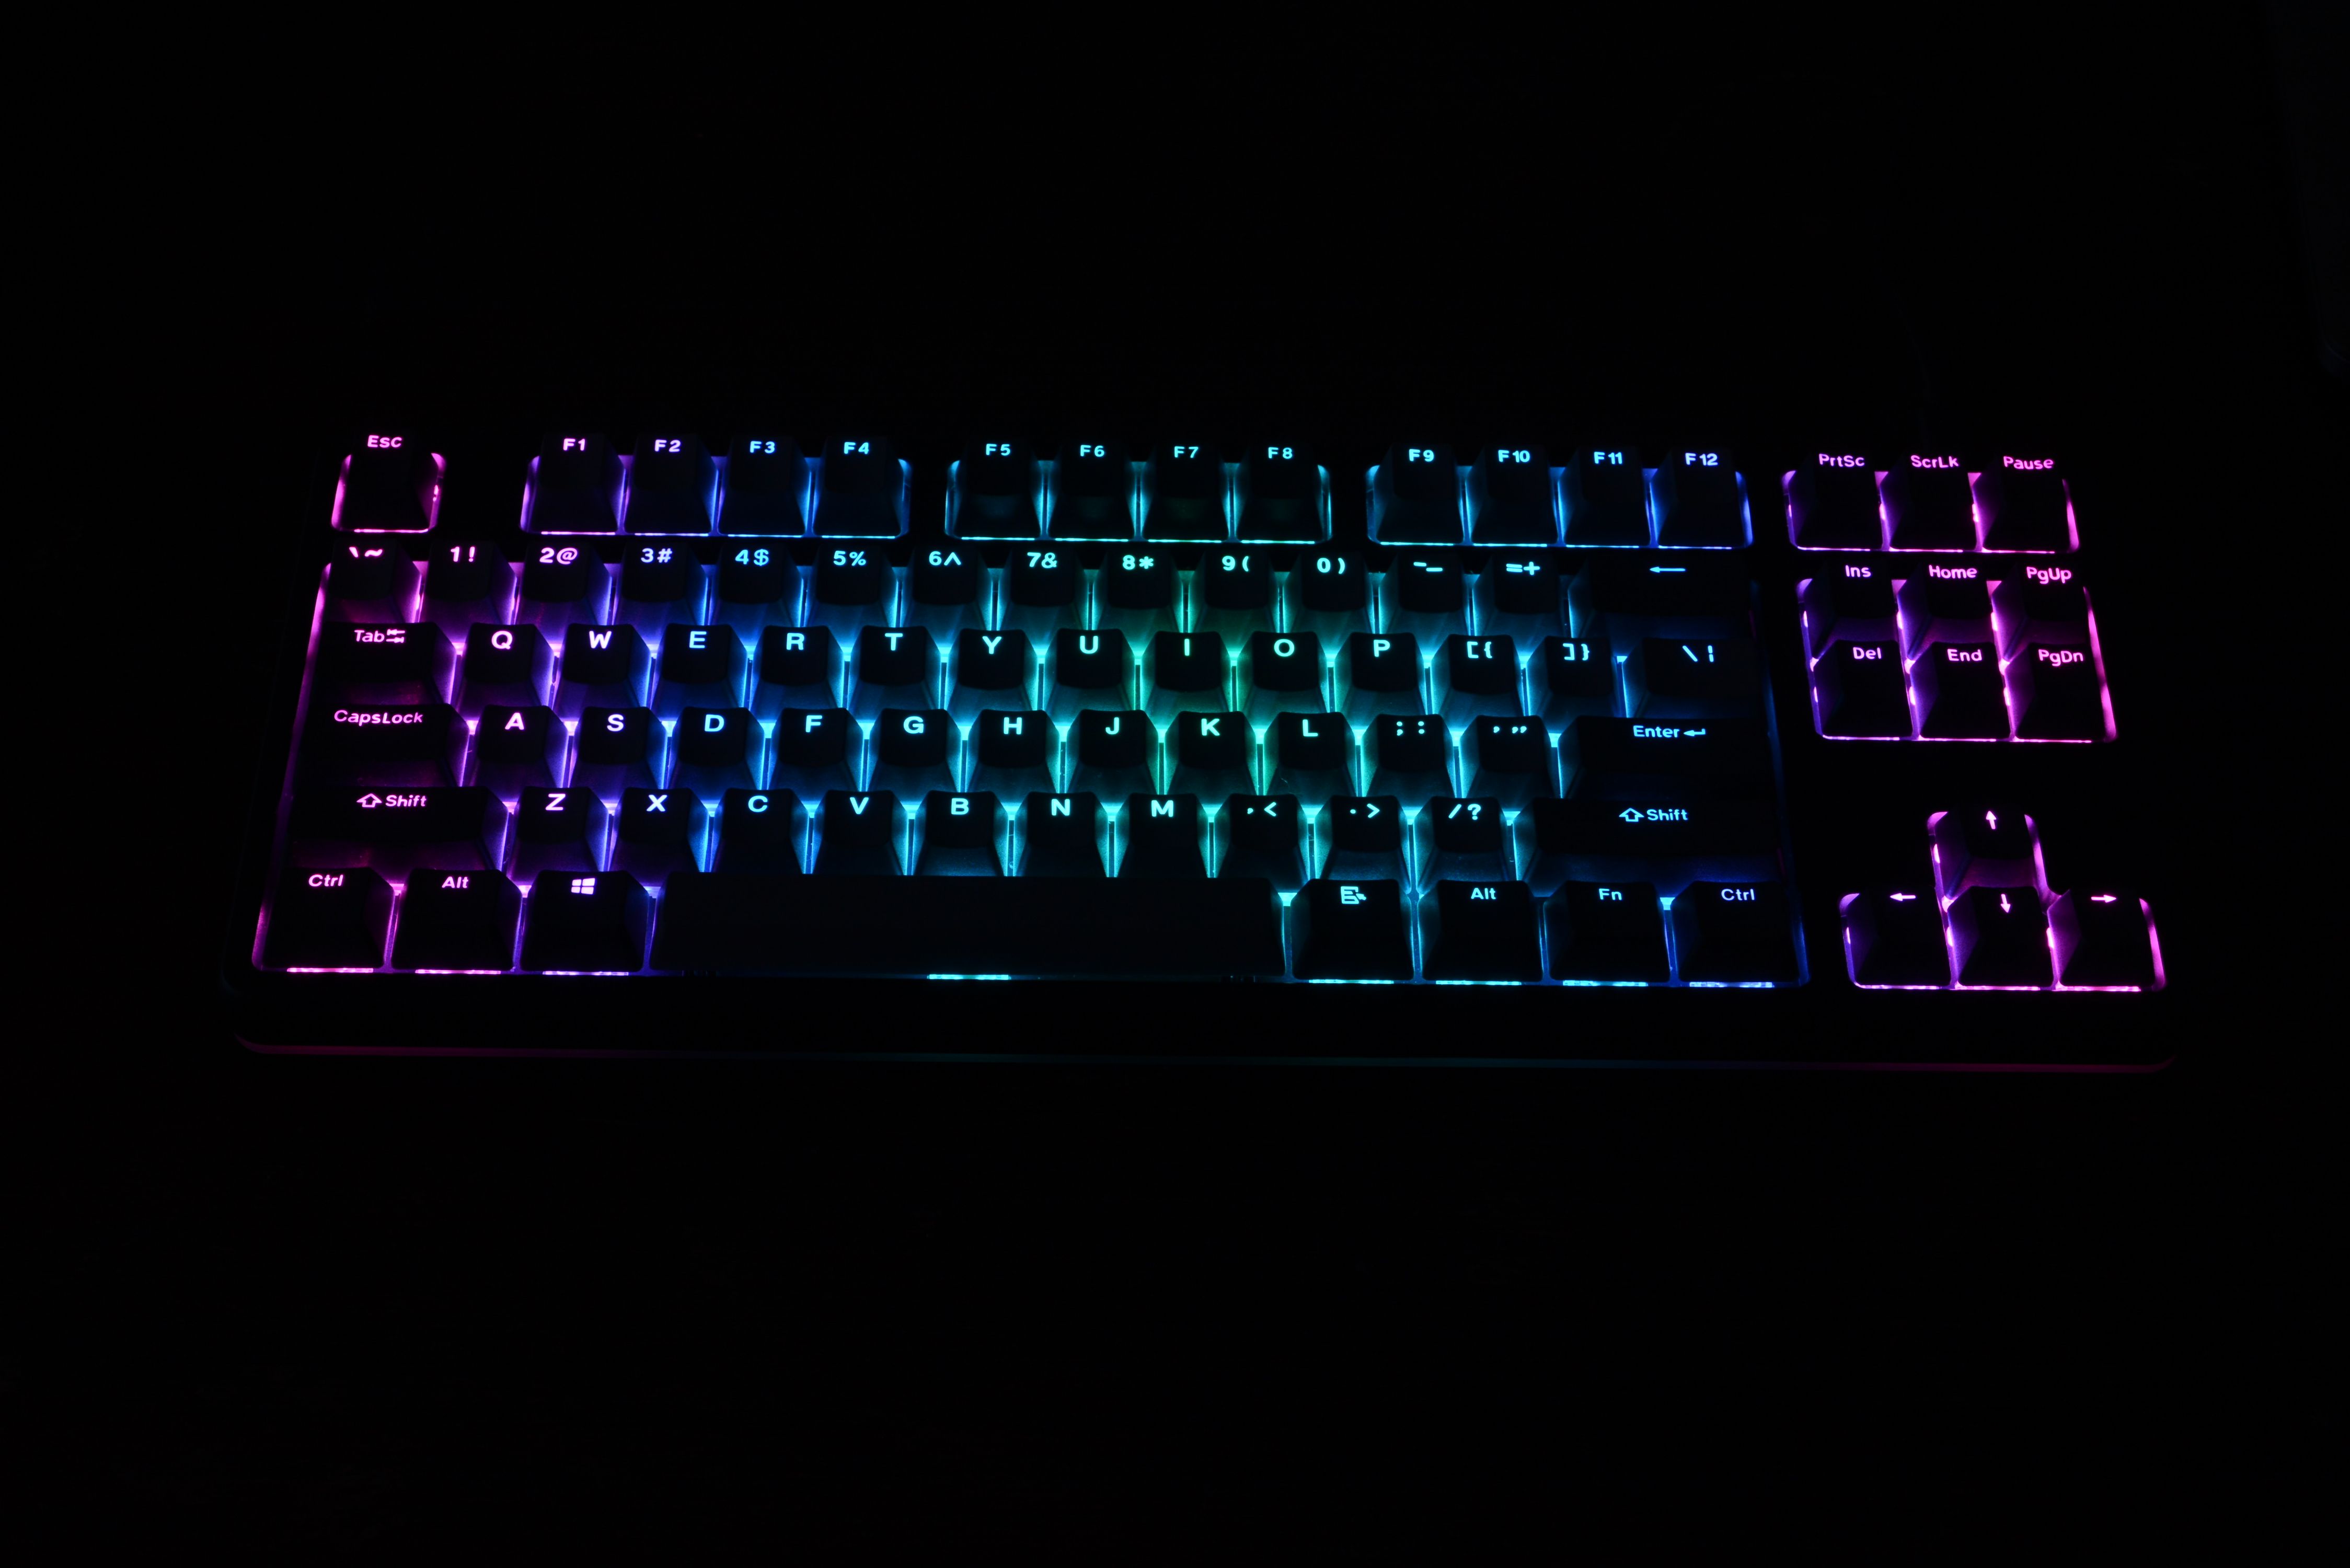 Each key has its own set of RGB LEDs that can create 16 million color combinations.Iljitsch van Beijnum
 Connecting headphones to the second USB-C port (using Apple's USB-C headphone adapter)Iljitsch van Beijnum
The keyboard is one of the two parts of a computer setup where flesh and blood meet plastic and metal. (The other being the mouse or trackpad.) Using a keyboard effectively means moving fingers with the precision a computer can understand, often doing so faster than the speed of conscious thought. So although many people are fine with a cheap or default keyboard—as long as it registers keypresses reliably—others don't mind spending a bit more on something better.
And then the real connoisseurs spend hundreds of dollars ordering parts from all over the world to build their own custom, dreamlike keyboard—a mechanical keyboard, of course, where each key has its own mechanical switch.
I didn't want to go too far overboard when I recently, finally took the custom keyboard plunge. So I decided to get the pre-built but very customizable Drop CTRL instead. The Drop CTRL is a tenkeyless with 100 Hz individual RGB LEDs supporting hot-swappable Cherry MX style switches (plate-mount only) running the QMK firmware. It comes with OEM profile doubleshot PBT shine-through keycaps and a choice of switches. Phew. But, no, none of that is meaningless marketing talk.
I paid $225 for a high-profile black model with Cherry MX Brown switches installed (plus $15 shipping from the US to Europe; surprisingly cheap). And after 33 agonizing days of waiting, I finally started my journey down the custom keyboard rabbit hole.
USB-C 1.1
Drop CTRL
However, although the connector is the latest and greatest, the protocol is USB 1.1 full speed. That means only 12 Mbps, and the keyboard only draws 500 mA power. The second port charges my iPhone at about 2 W, and charging continues when the computer and the keyboard are asleep.
The included cable is a USB 3.0 type A to USB type C one. I tried some cables with USB-C at both ends, but that often didn't work. Notably, Thunderbolt-compatible cables connected to a Thunderbolt-compatible port didn't work. Some charging / USB 2.0 cables connected to a Thunderbolt port on the computer did work, and connecting to the USB-C port on my monitor also worked with several cables.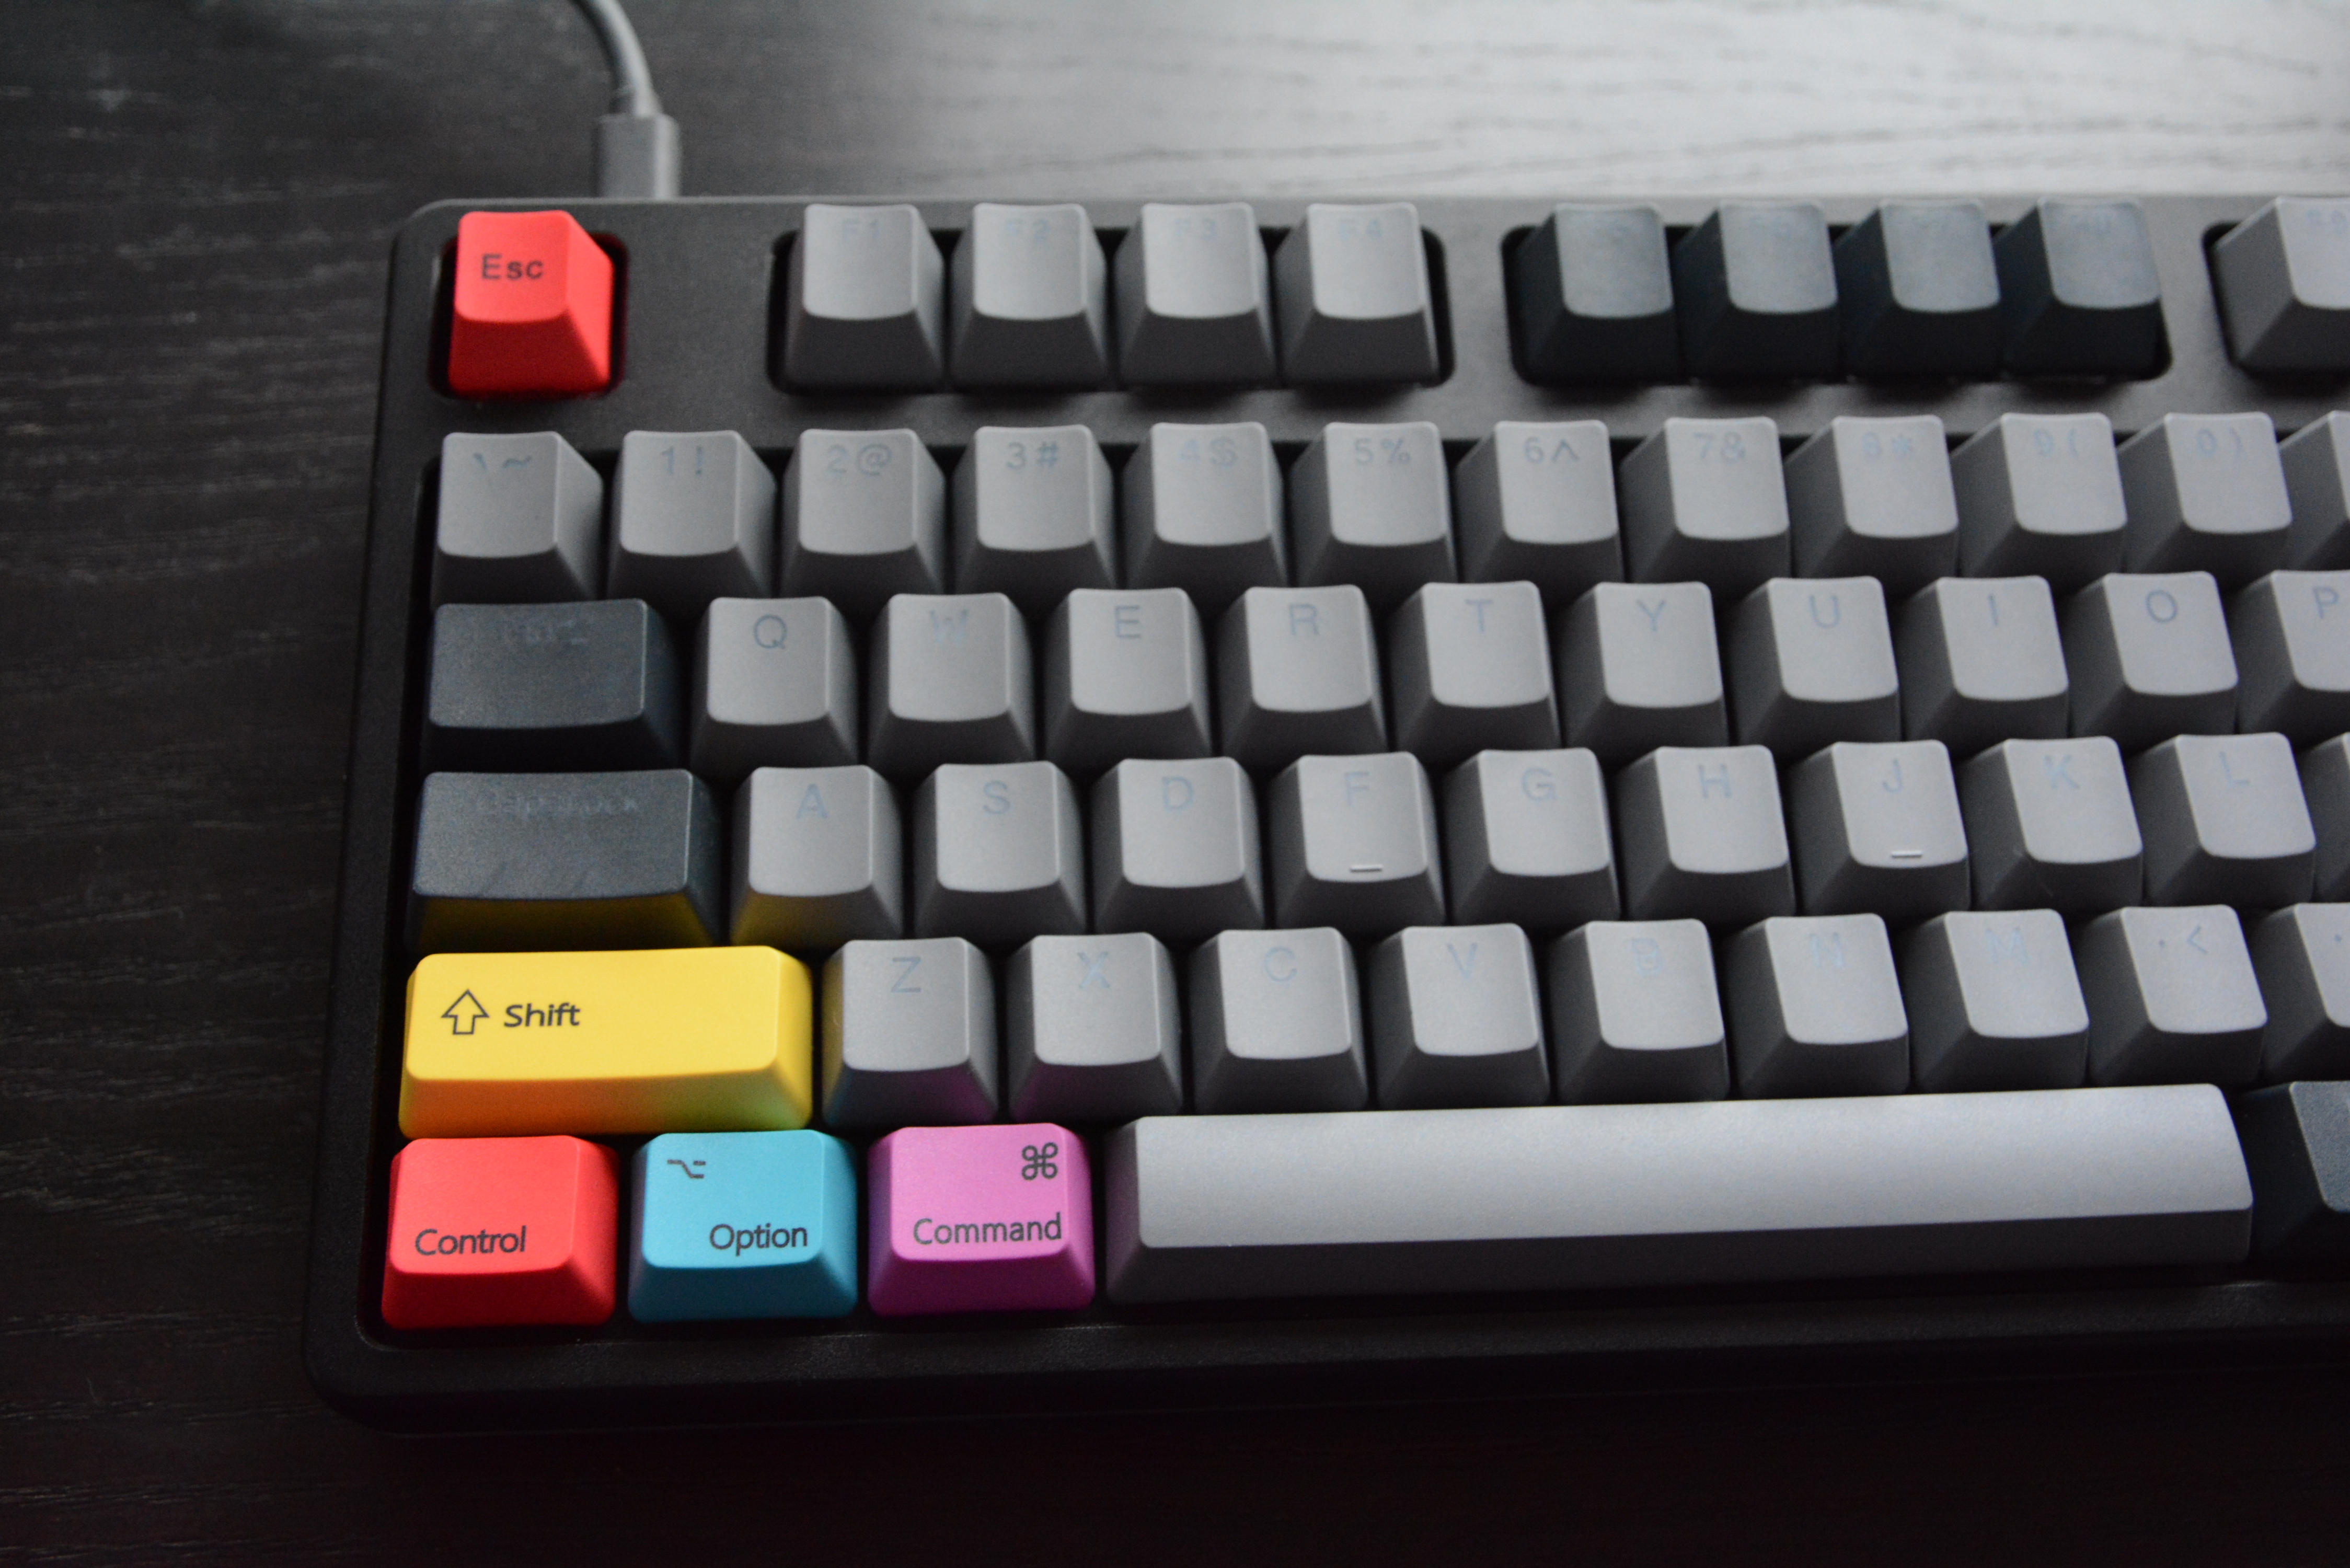
RGB LEDs
After connecting the cable, the LEDs under each key and surrounding the sides of the keyboard lit up in a rippling rainbow pattern. That colored lighting certainly adds flair, but it's also functional: with the LED lighting turned off, it's very hard to make out the legends on the keys.
Each key has its own set of RGB LEDs that can create 16 million color combinations. On cheaper keyboards with this feature, the LEDs may flicker to some degree, but the CTRL's LEDs refresh at a rate of 100 Hz, which means that there is no perceptible flicker. You can change between a handful of animations and several solid colors, and you can change other settings for the LEDs with key combinations. I found that I didn't mind the RGB animations happening in my peripheral vision, especially with the speed turned down a bit.
Less is more: Ditching the numpad
Civilized people can disagree about the usefulness of the number pad, but it seems in mechanical keyboard enthusiast circles, less is more. The first step to decluttering your typing experience is to forego the numpad and use a "TKL,” a tenkeyless—such as the CTRL. This is sometimes called an "80%" keyboard, but note that the Drop CTRL has 87 keys while a 100% keyboard would have around 104 keys. So don't take such percentages too literally. Interestingly, this 80% keyboard weighs about 80% of my full-size IBM Model M at 1760 grams (almost 4 pounds).
The Drop ALT is the CTRL's smaller sibling, a 65% model with 67 keys. The ALT skips the function key row and a handful of other keys, but, importantly, it still has cursor keys. Another common size is 60%, which does ditch the cursor keys. Those are merely the common configurations, but there are also more obscure keyboard configuration options to choose from.
The default models of the CTRL and ALT use a floating key design that's popular with the kids these days. In this design, the base of the keyboard is a flat slab, with the switches sticking out about halfway and the keycaps "floating" above. I instead opted for a more traditional high-profile model, which hides the switches, thus avoiding illuminating my desk with the light escaping from under the keycaps.
Domes vs switches
Until about the early 1980s, keyboards used all kinds of unusual switches. Since the mid-1990s, rubber dome keyboards and their variants have become the dominant keyboard type. These work by having a rubber (well, silicone) dome under each key that collapses as the key is pressed, and then closes a circuit on a membrane underneath. Apart from the keycaps, this only requires some membranes with circuit traces on them and a silicone mat with the domes, so it's very cheap to make. One big advantage of rubber dome keyboards over other keyboard types is that they can be very quiet.
Rubber domes can handle a few million keystrokes per key. That sounds like a lot, but the most often used keys can easily be pressed a thousand times during an hour of typing, so it's not impossible to wear out a key on a dome keyboard in a year. And you can't replace or repair just one key, so that's the end of that keyboard.
Mechanical switches, on the other hand, are often rated for 50 million or more keystrokes. And a failed switch can be replaced. A mechanical keyboard switch is a small self-contained unit, with a housing holding a spring, the contact mechanism, and a stem that moves up and down which acts as a mounting point for the keycap.
Keyboards using mechanical switches were used a lot from the late 1980s until the meteoric rise of rubber dome keyboards during the 1990s, but they never went away completely. These days, they're prized by keyboard enthusiasts as well as gamers.
There's a switch for that
There are basically three types of mechanical keyboard switches: linear, clicky, and tactile. A linear switch simply goes further down the harder you press the key. The common key travel is four millimeters, with the switch actuating and generating a keypress event with the key halfway pressed at 2 mm. So unlike with rubber dome switches, there is no need to press the key all the way down, i.e. to "bottom out.” However, without bottoming out it's hard to tell when the switch has actuated.
Clicky switches solve this with an extra mechanism that provides an audible and tactile click when the switch actuates. Tactile switches split the difference between linear and clicky and provide just tactile feedback, without an audible click.
Apart from linear, clicky, and tactile, switches differ in their actuation force, which we as adherents of the International System of Units measure in centi-Newtons (cN). These happen to be almost the same as grams of force (for those of us stuck on the surface of the Earth, anyway). A middle of the road switch will have an actuation force of about 50 g, with 60 or 70 g to bottom out. Light switches actuate between 35 and 45 g or so, while heavy switches start at about 60 g actuation force. Clicky and tactile switches also vary widely in their clickiness and/or tactility.
Linear switches are said to be popular with gamers, who want to ride the actuation point for the best response times when pressing the same key in quick succession. Typists, on the other hand, prize clicky or tactile switches for their feedback.
 Can I interest you in some pin talk?Iljitsch van Beijnum
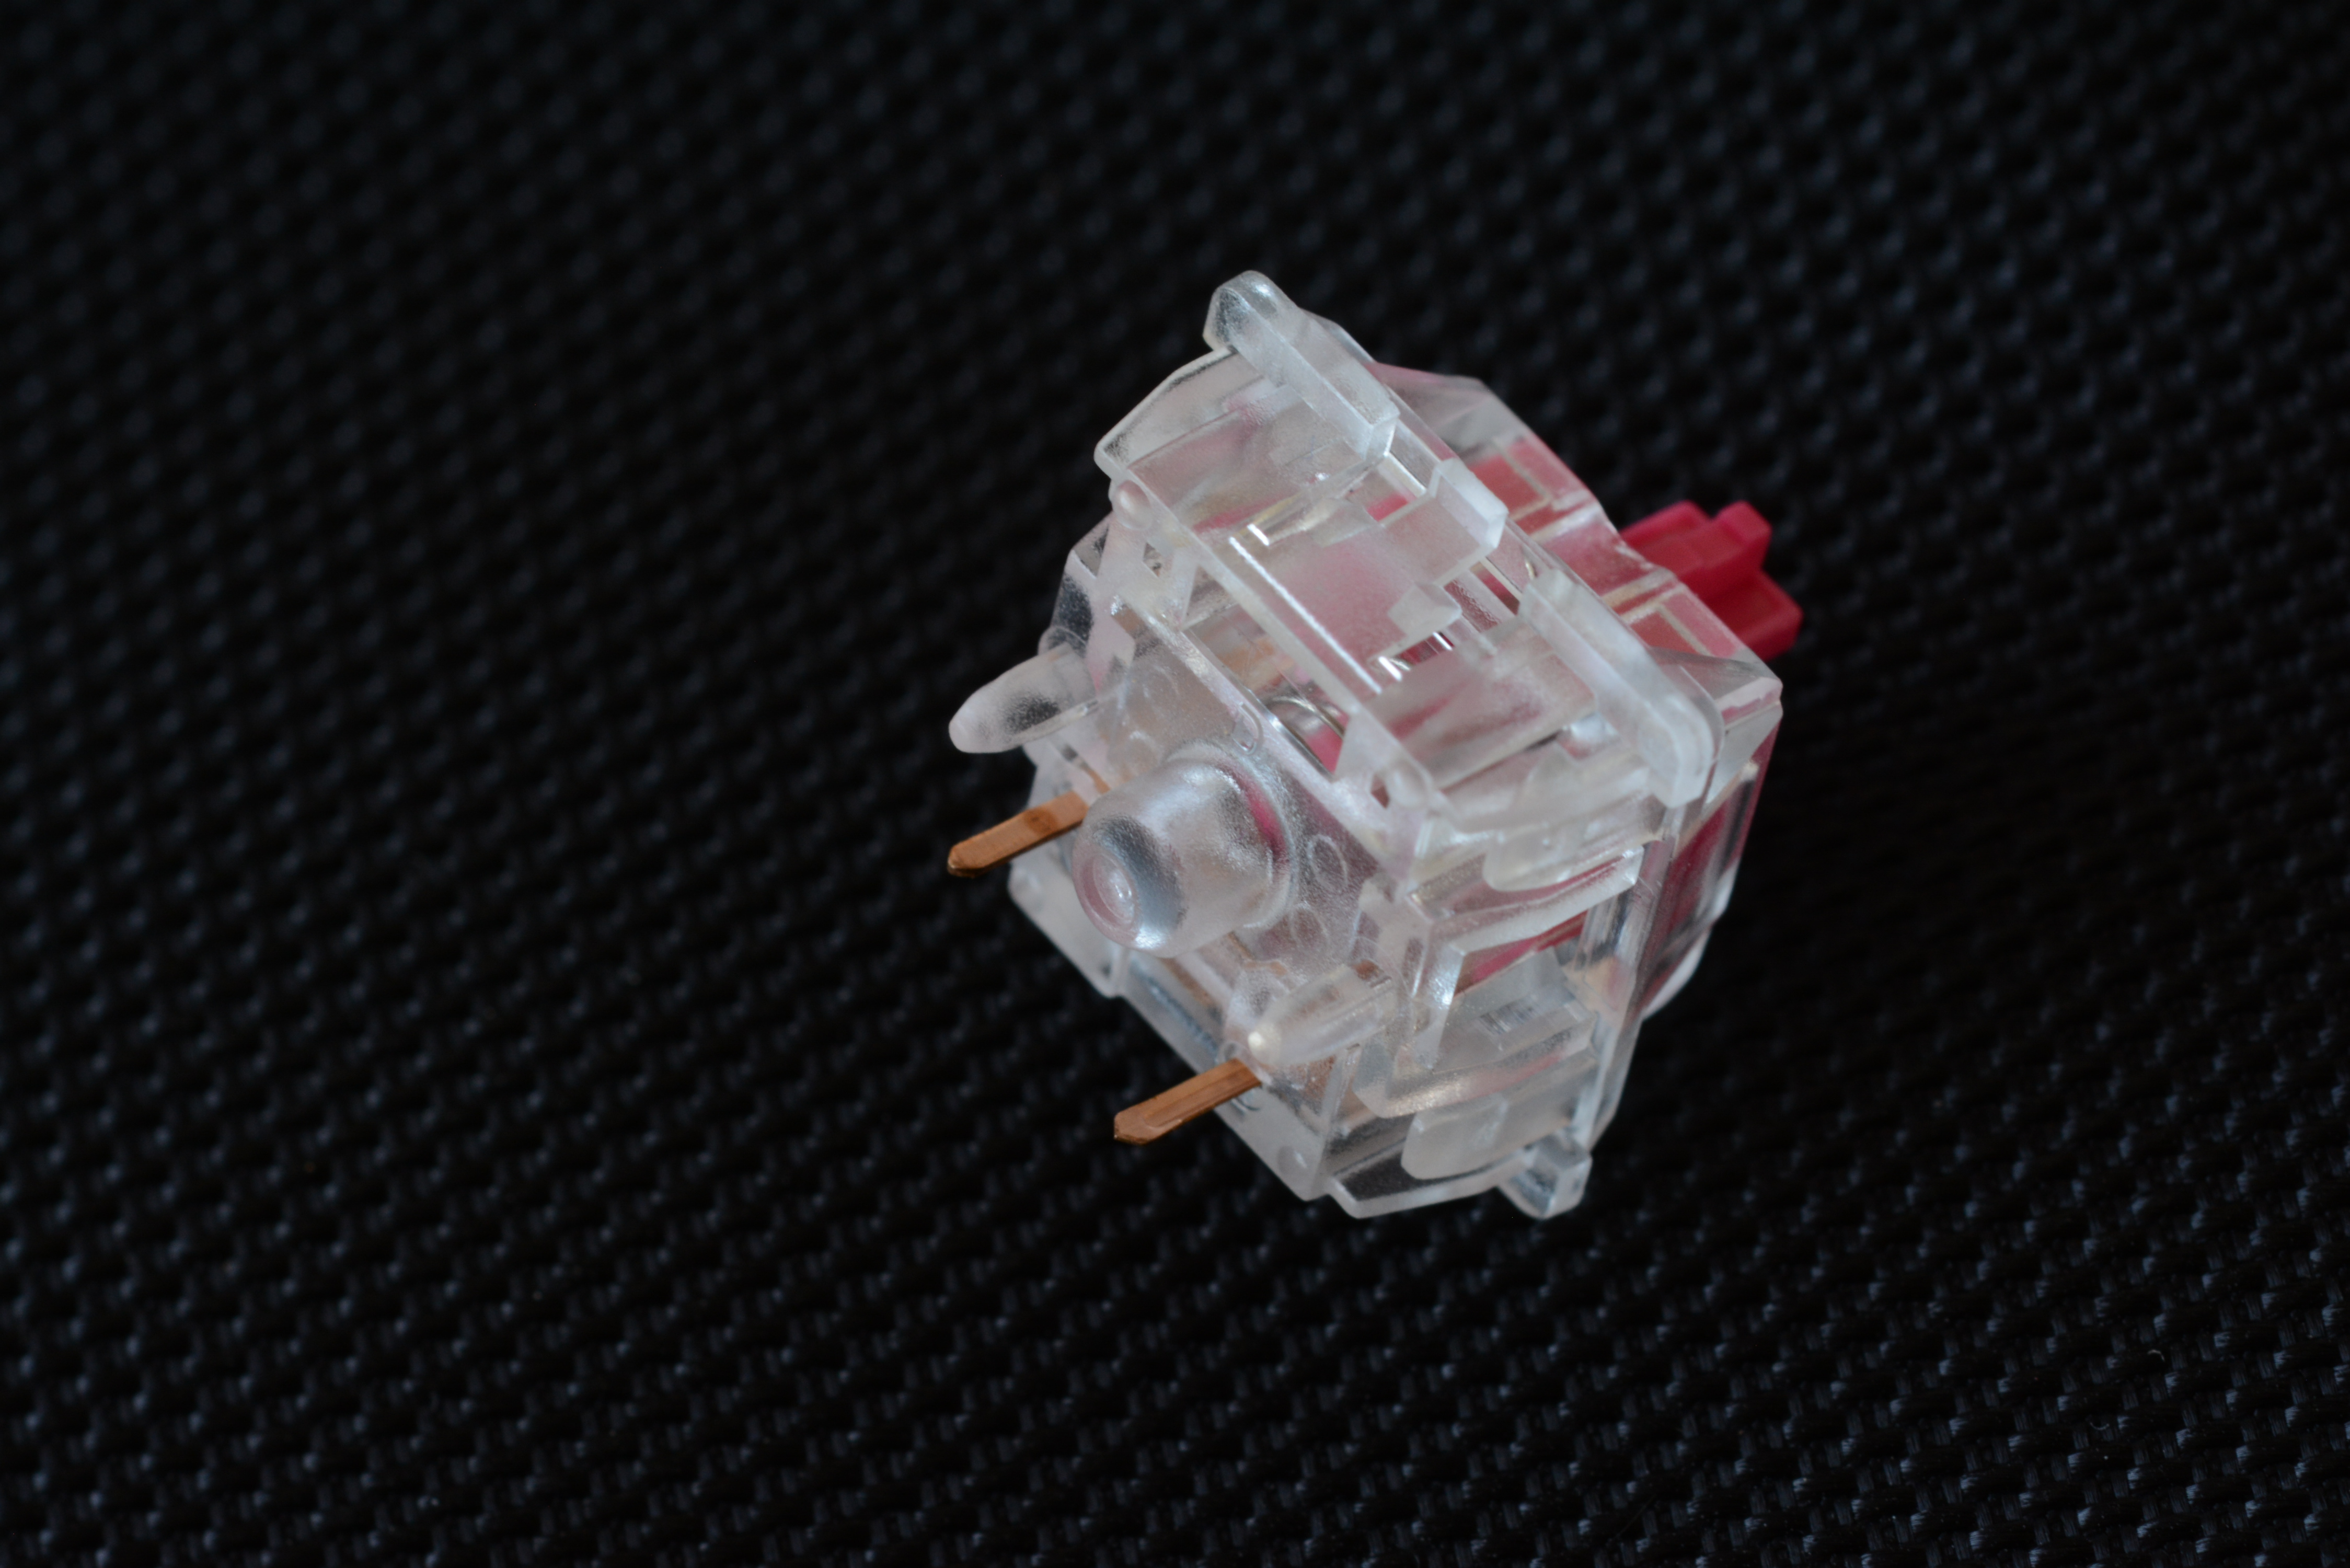 A 5-pin PCB-mounted Gateron Aliaz switchIljitsch van Beijnum
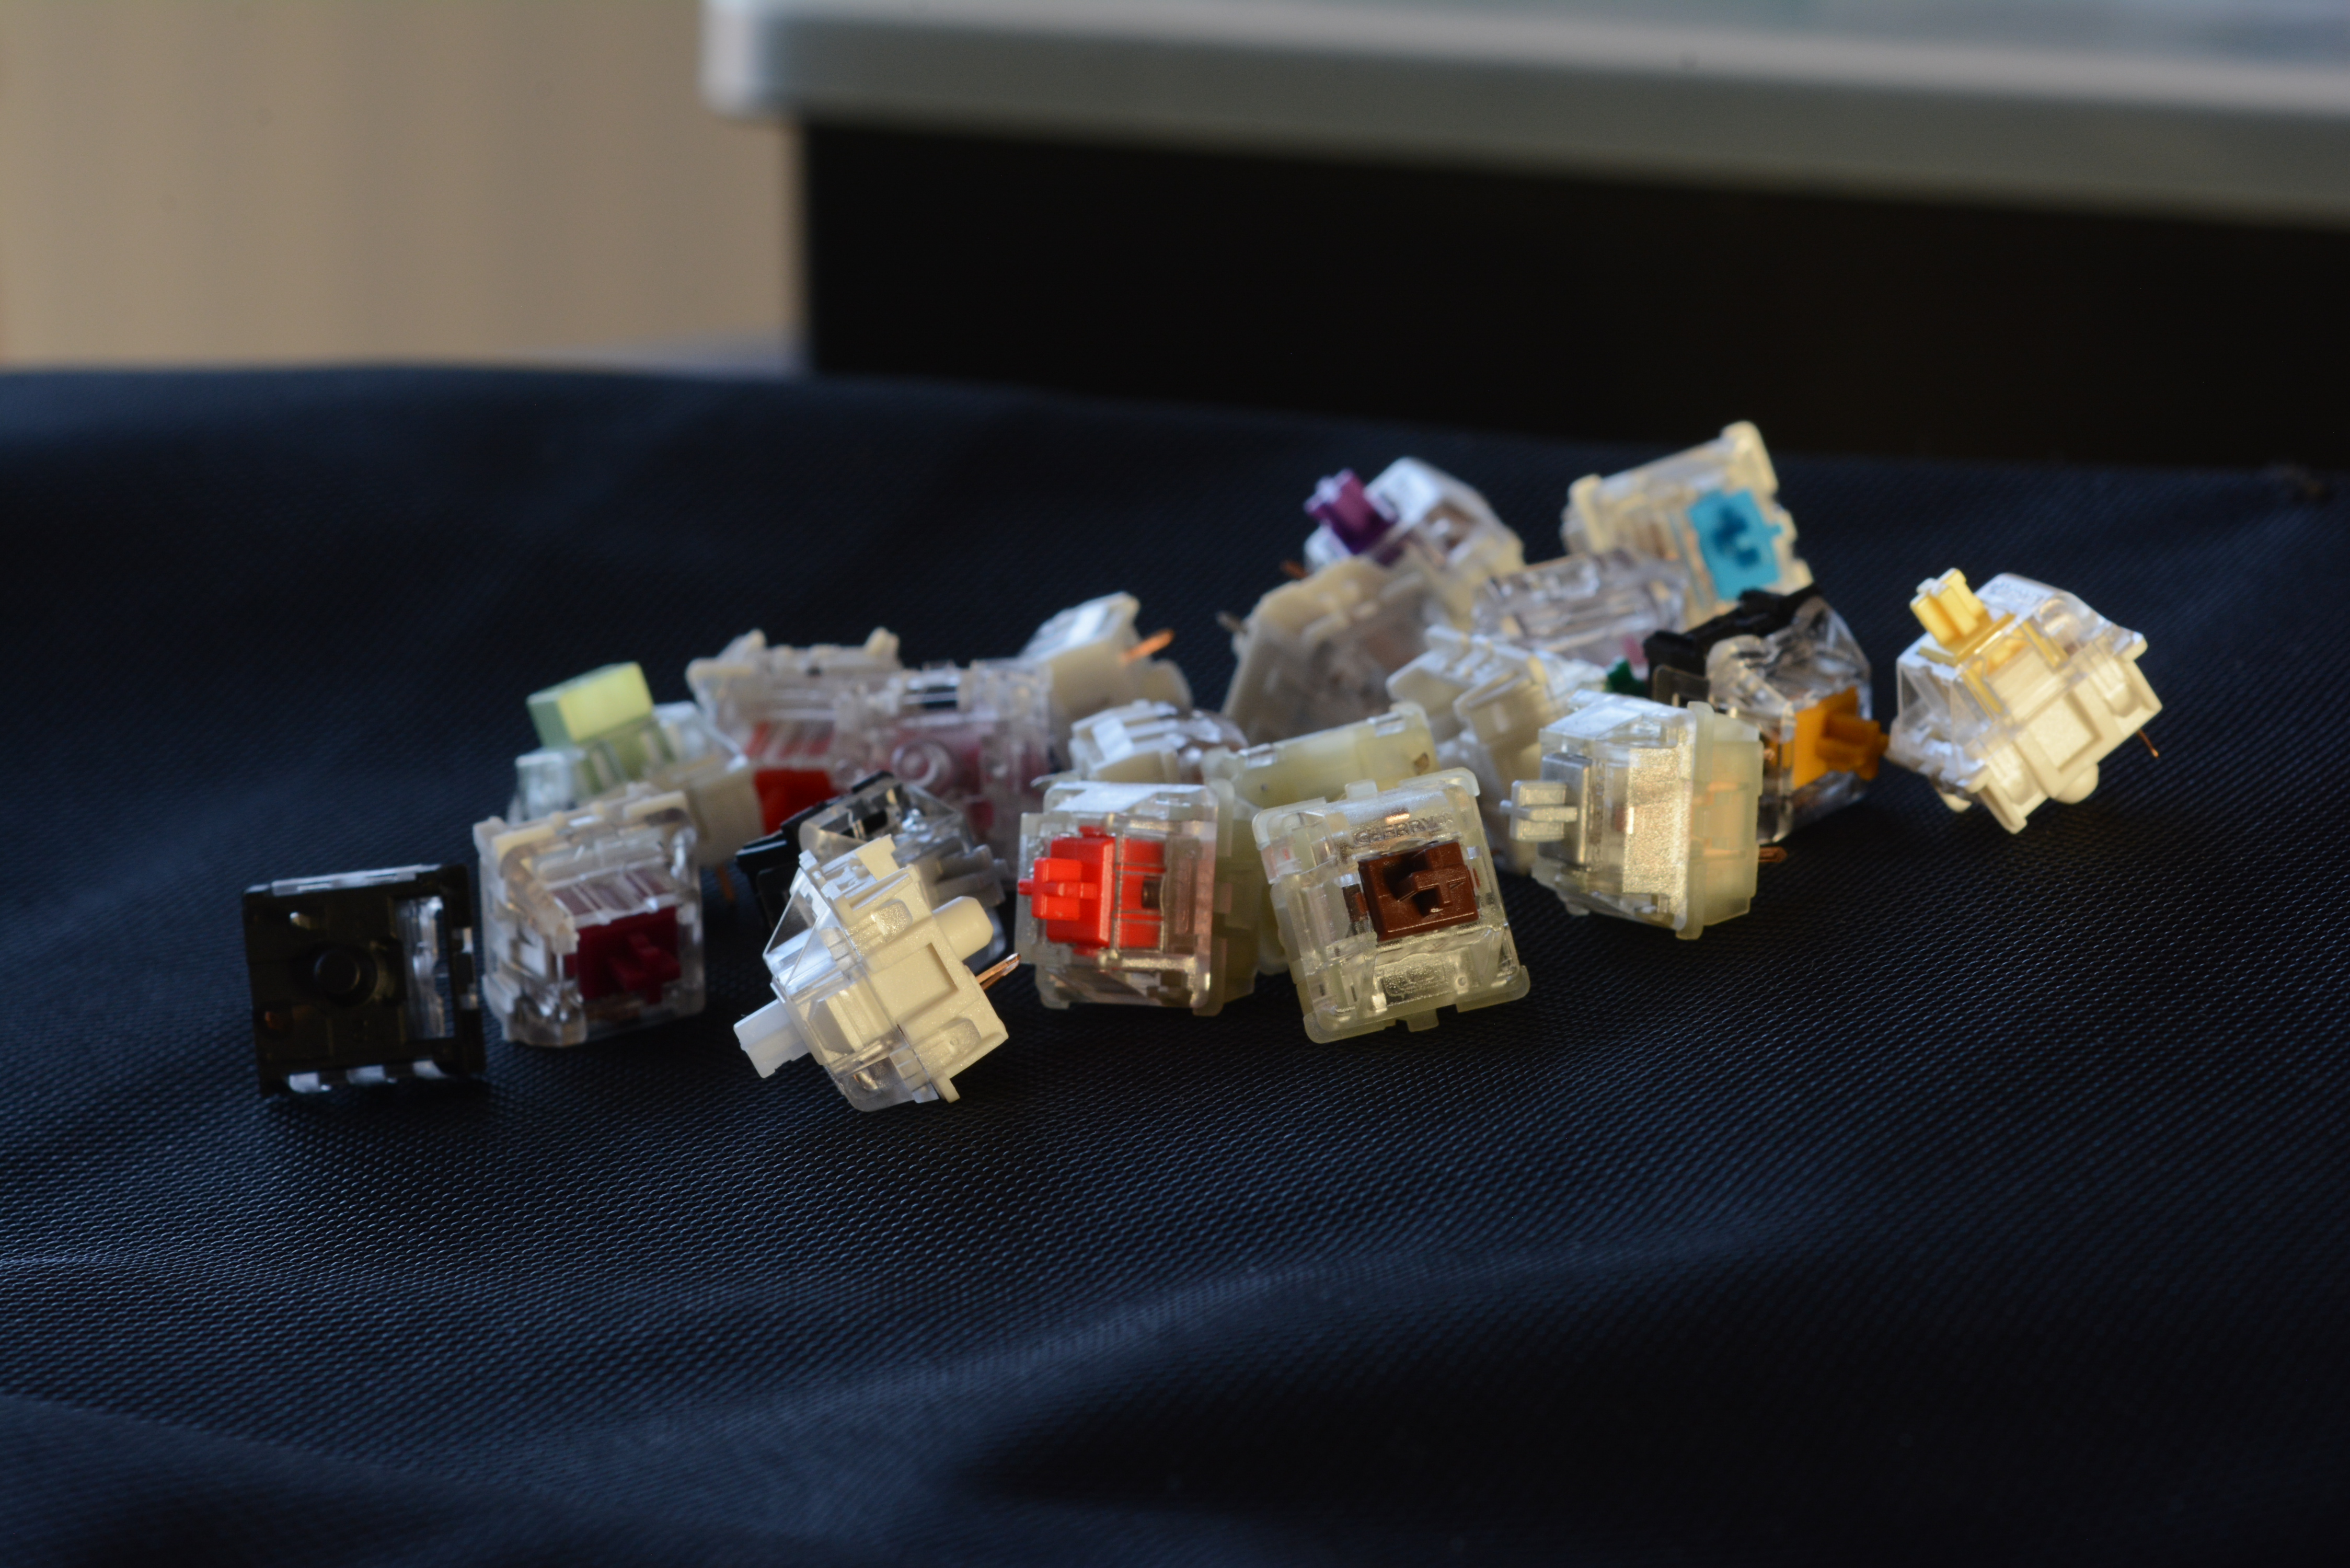 Some people want diamond rings / Some just want [to customize every key]...Iljitsch van Beijnum
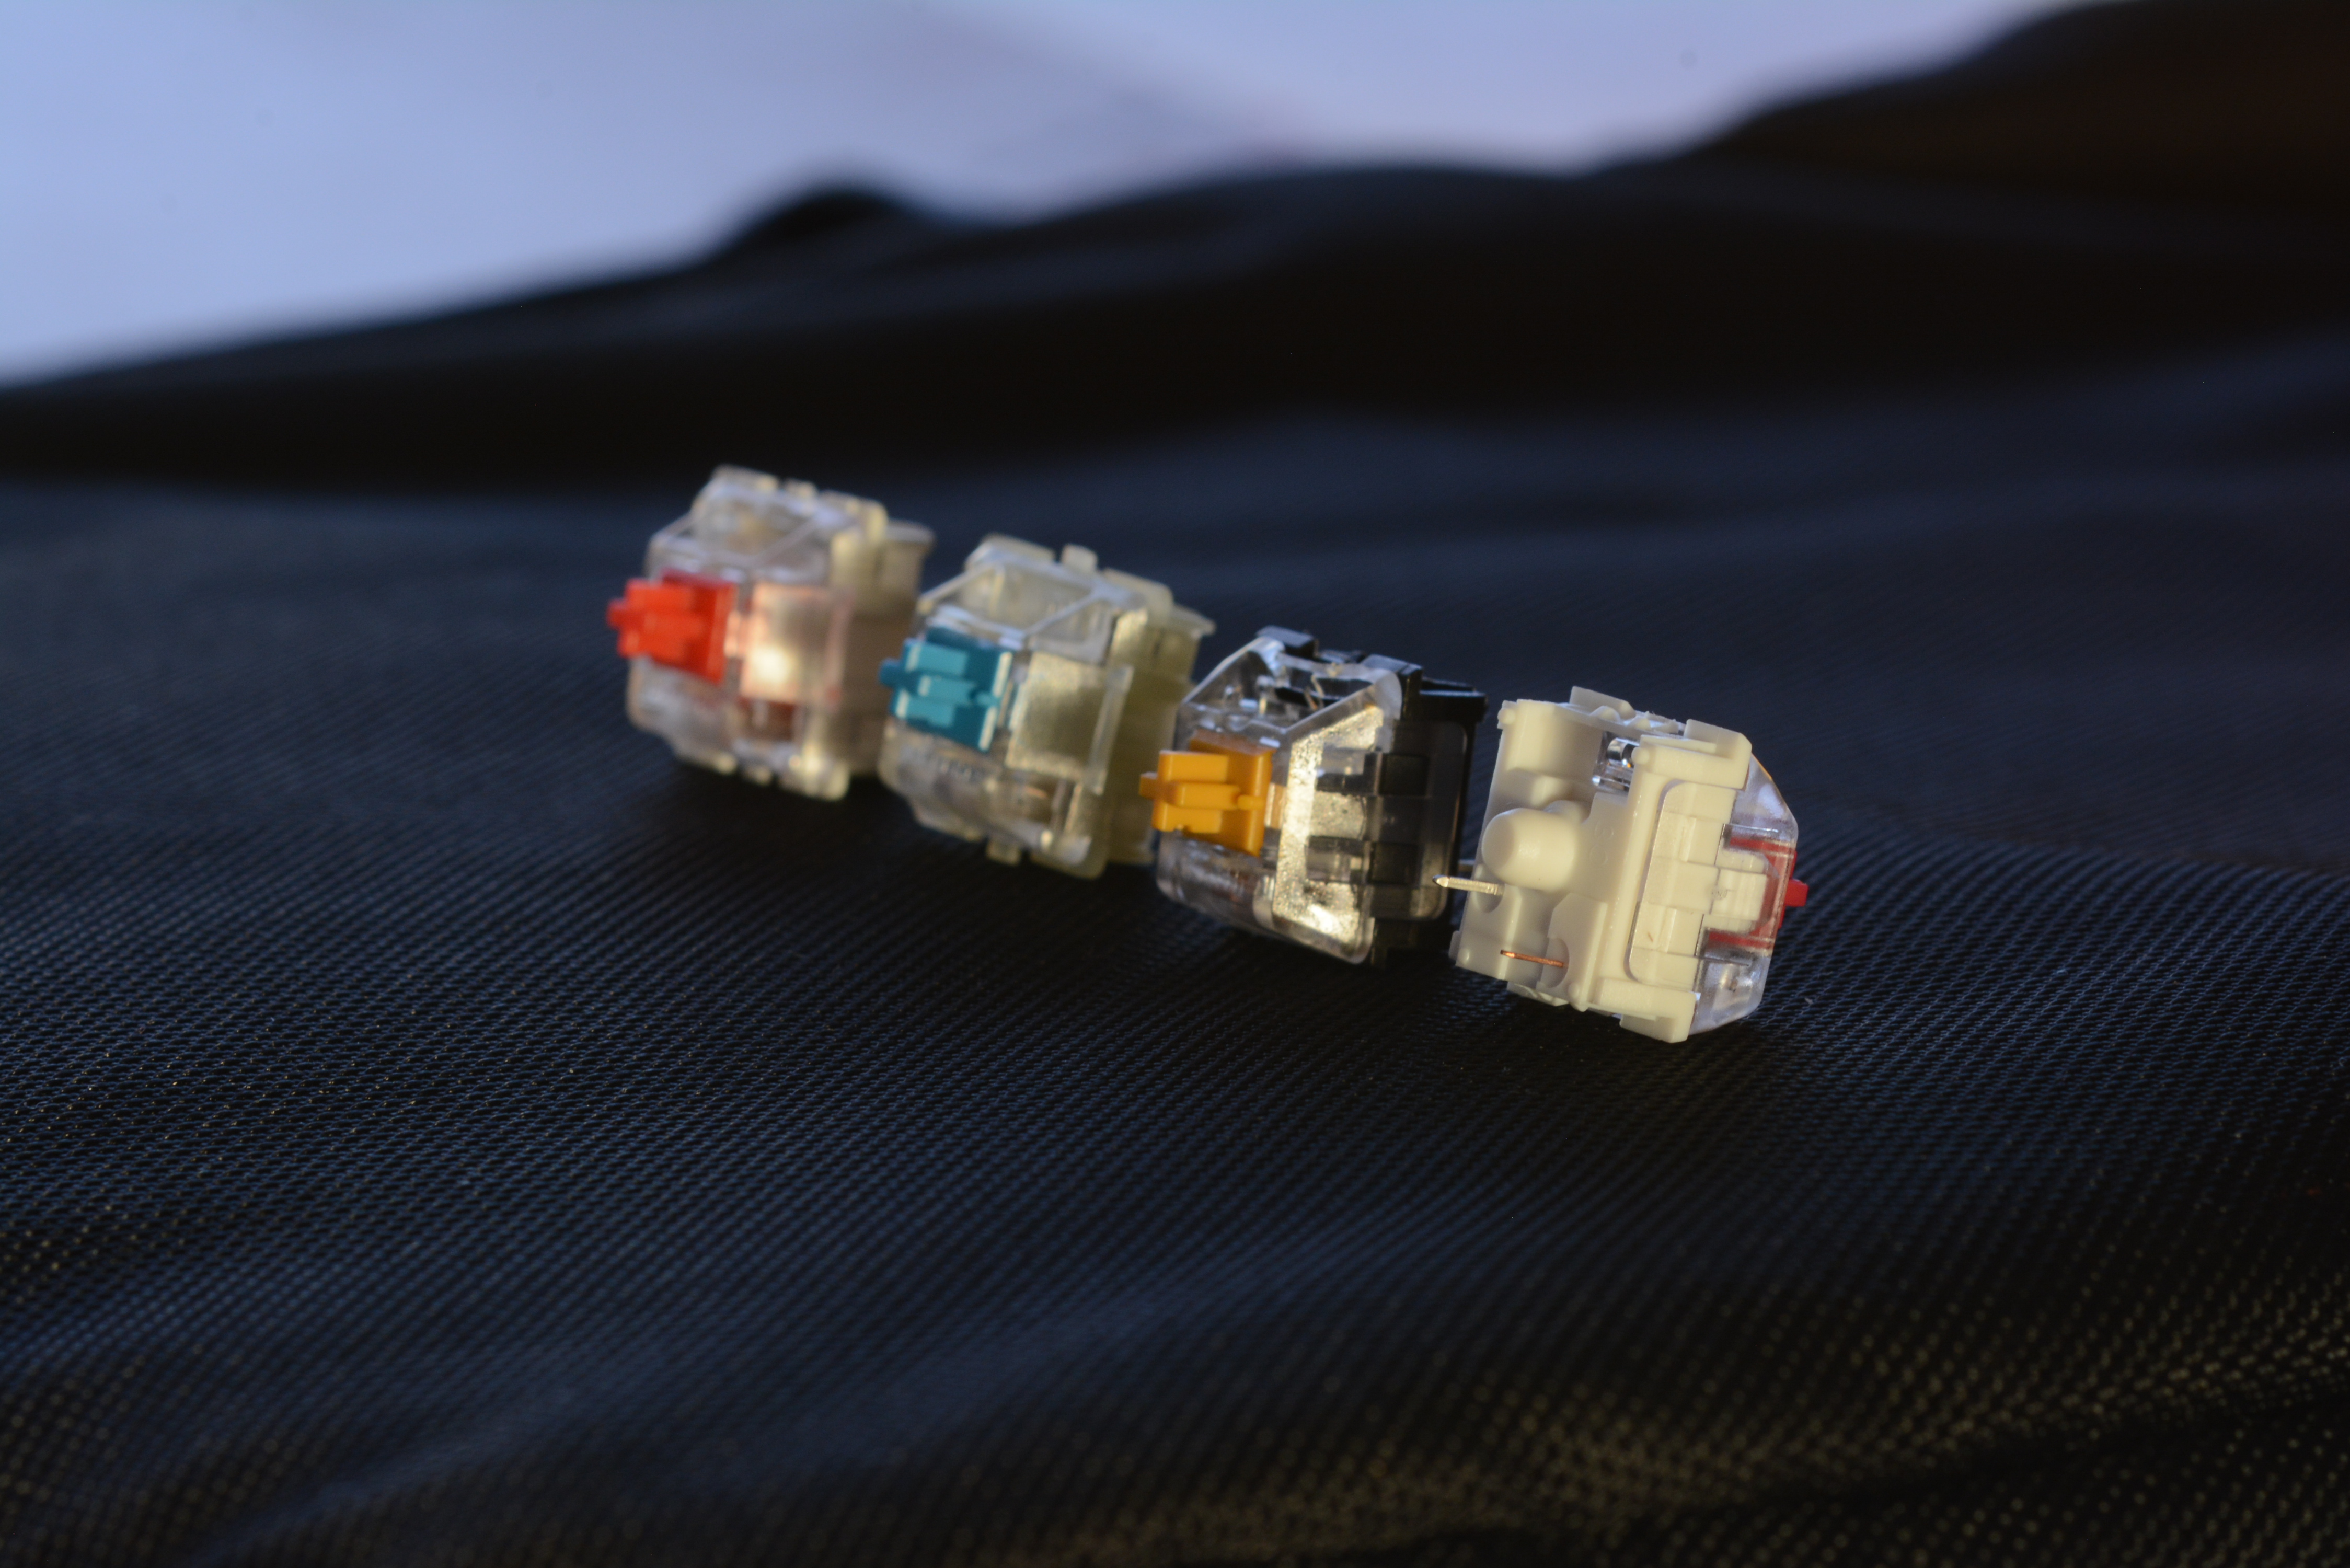
Putting some switches to the test
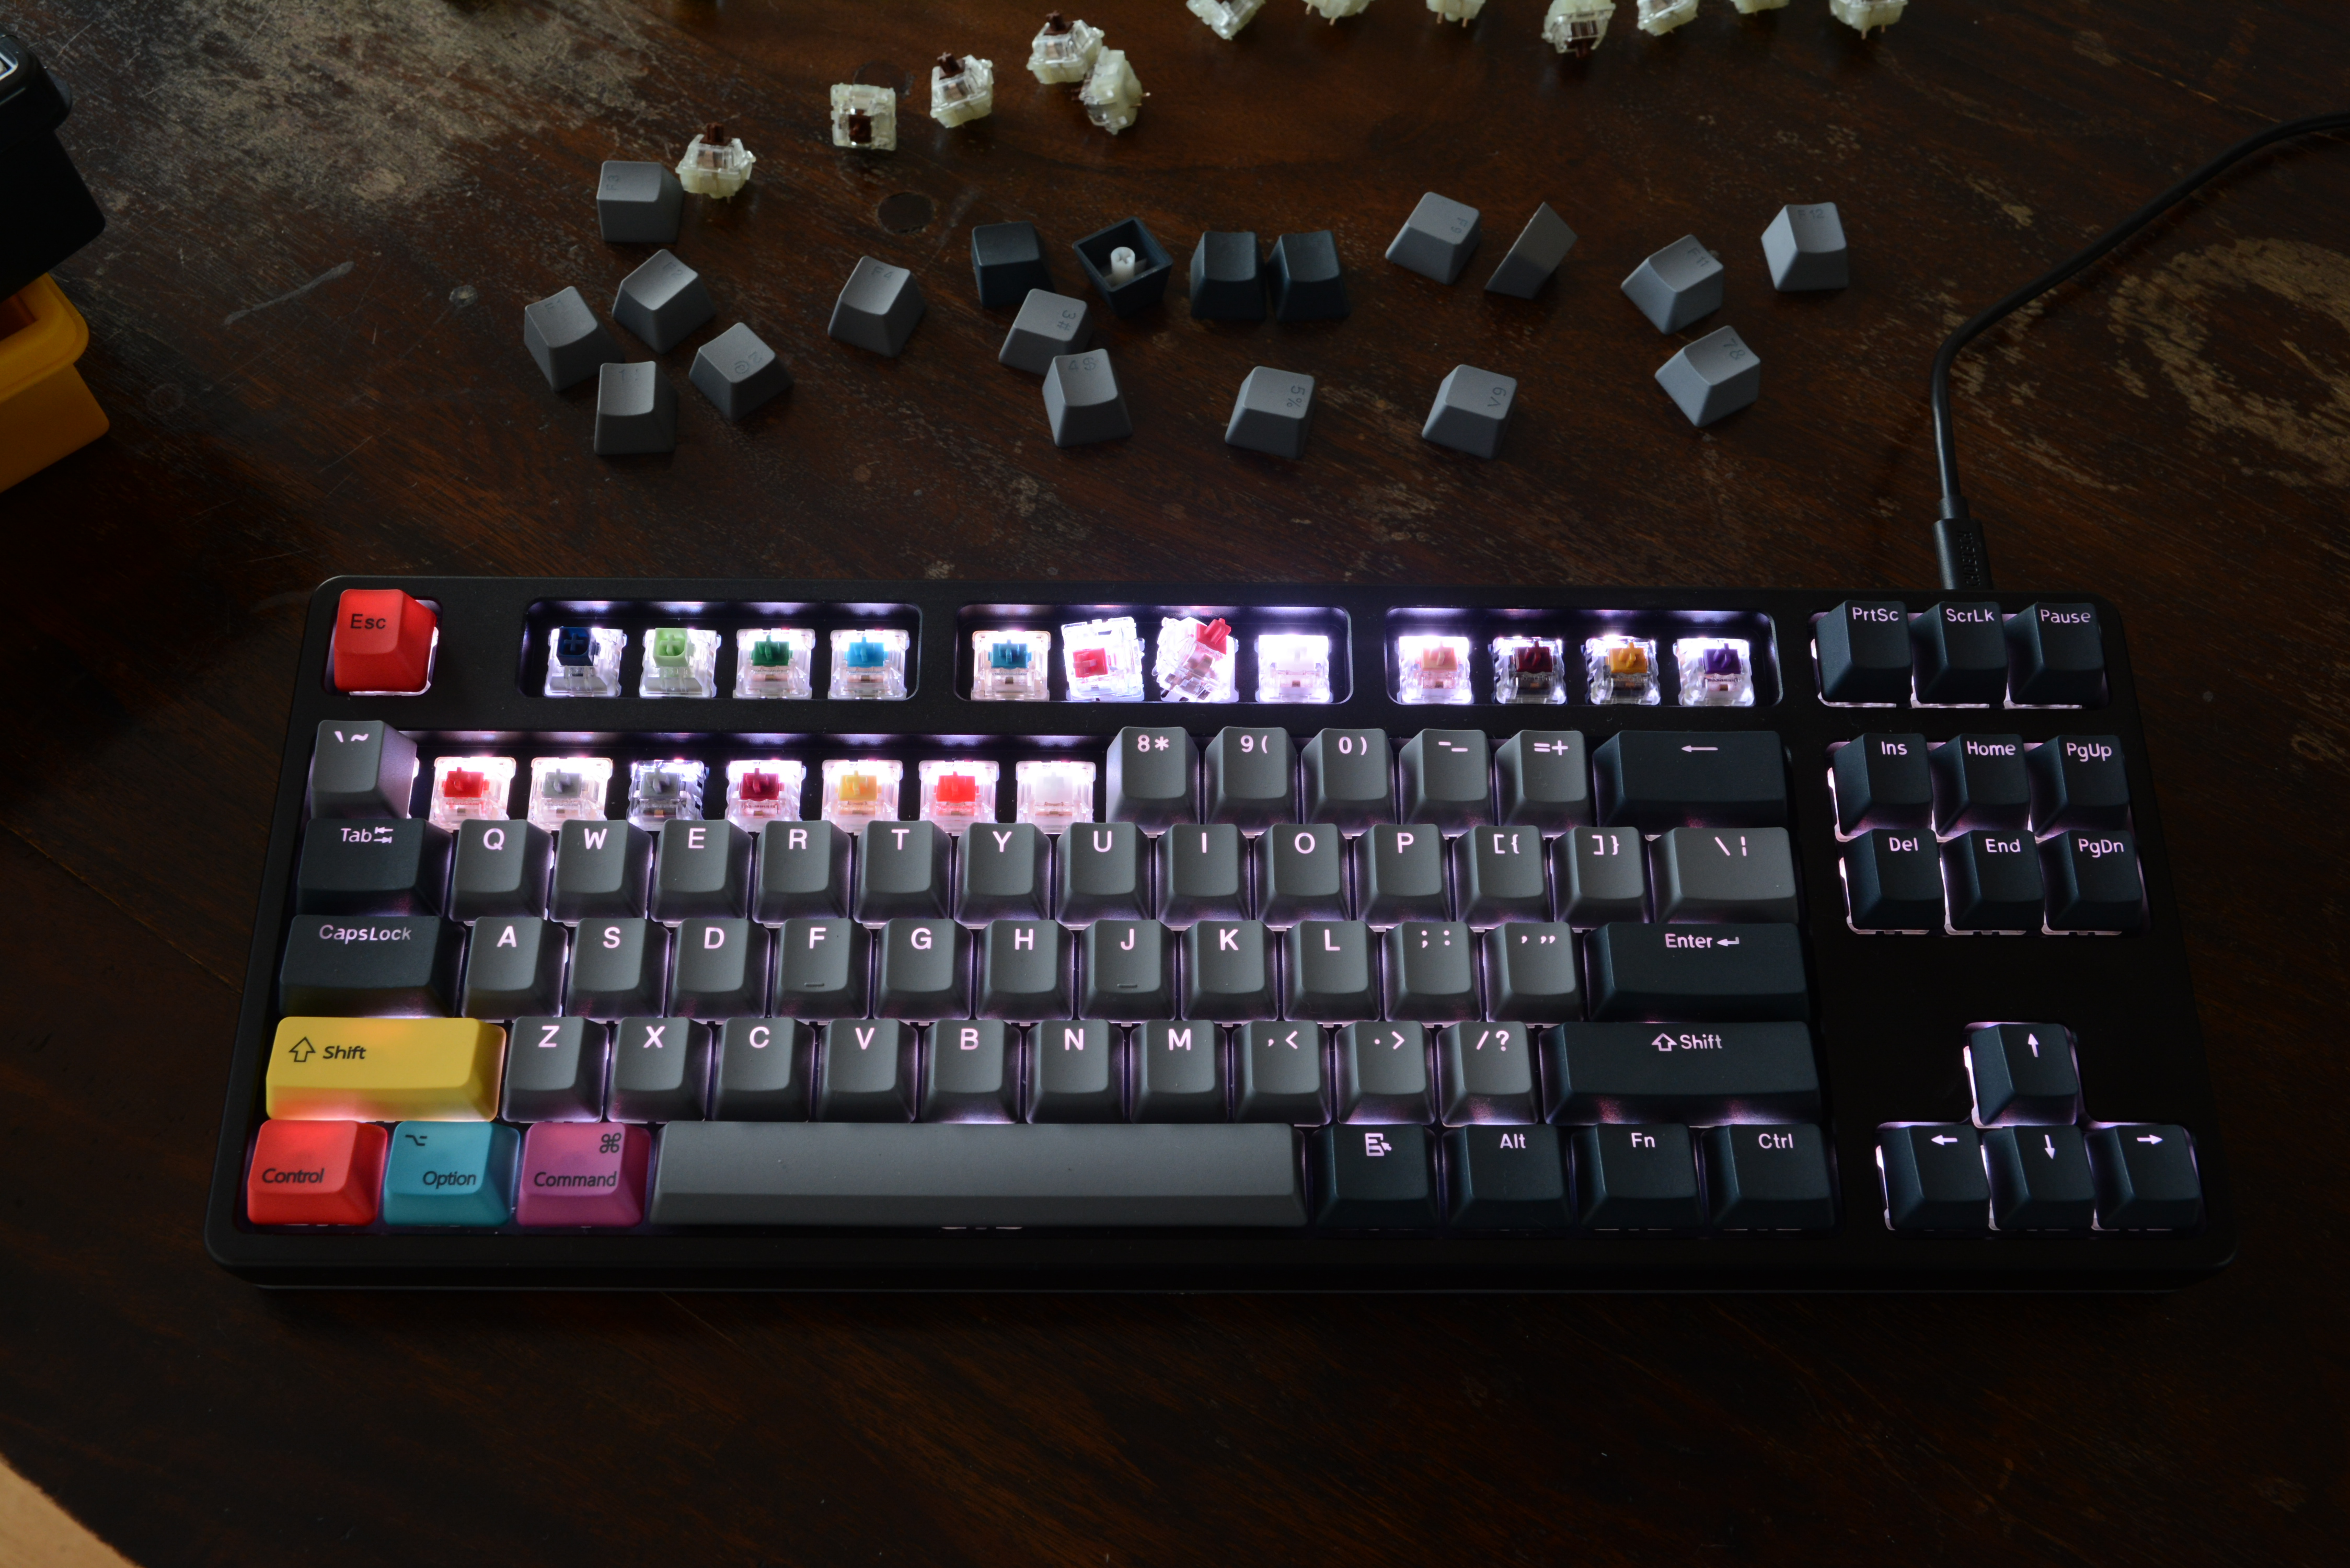
Again, I got the CTRL with Cherry MX Brown RGB switches installed. That's a solid middle-of-the-road tactile choice, which cost me $25 extra. Cherry is a long-time maker of mechanical keyboard switches, but after their patents expired, other companies, such as Gateron and Kailh, started to make clones and compatible switches. There are incompatible switches from other vendors to look out for, but luckily these are less common.
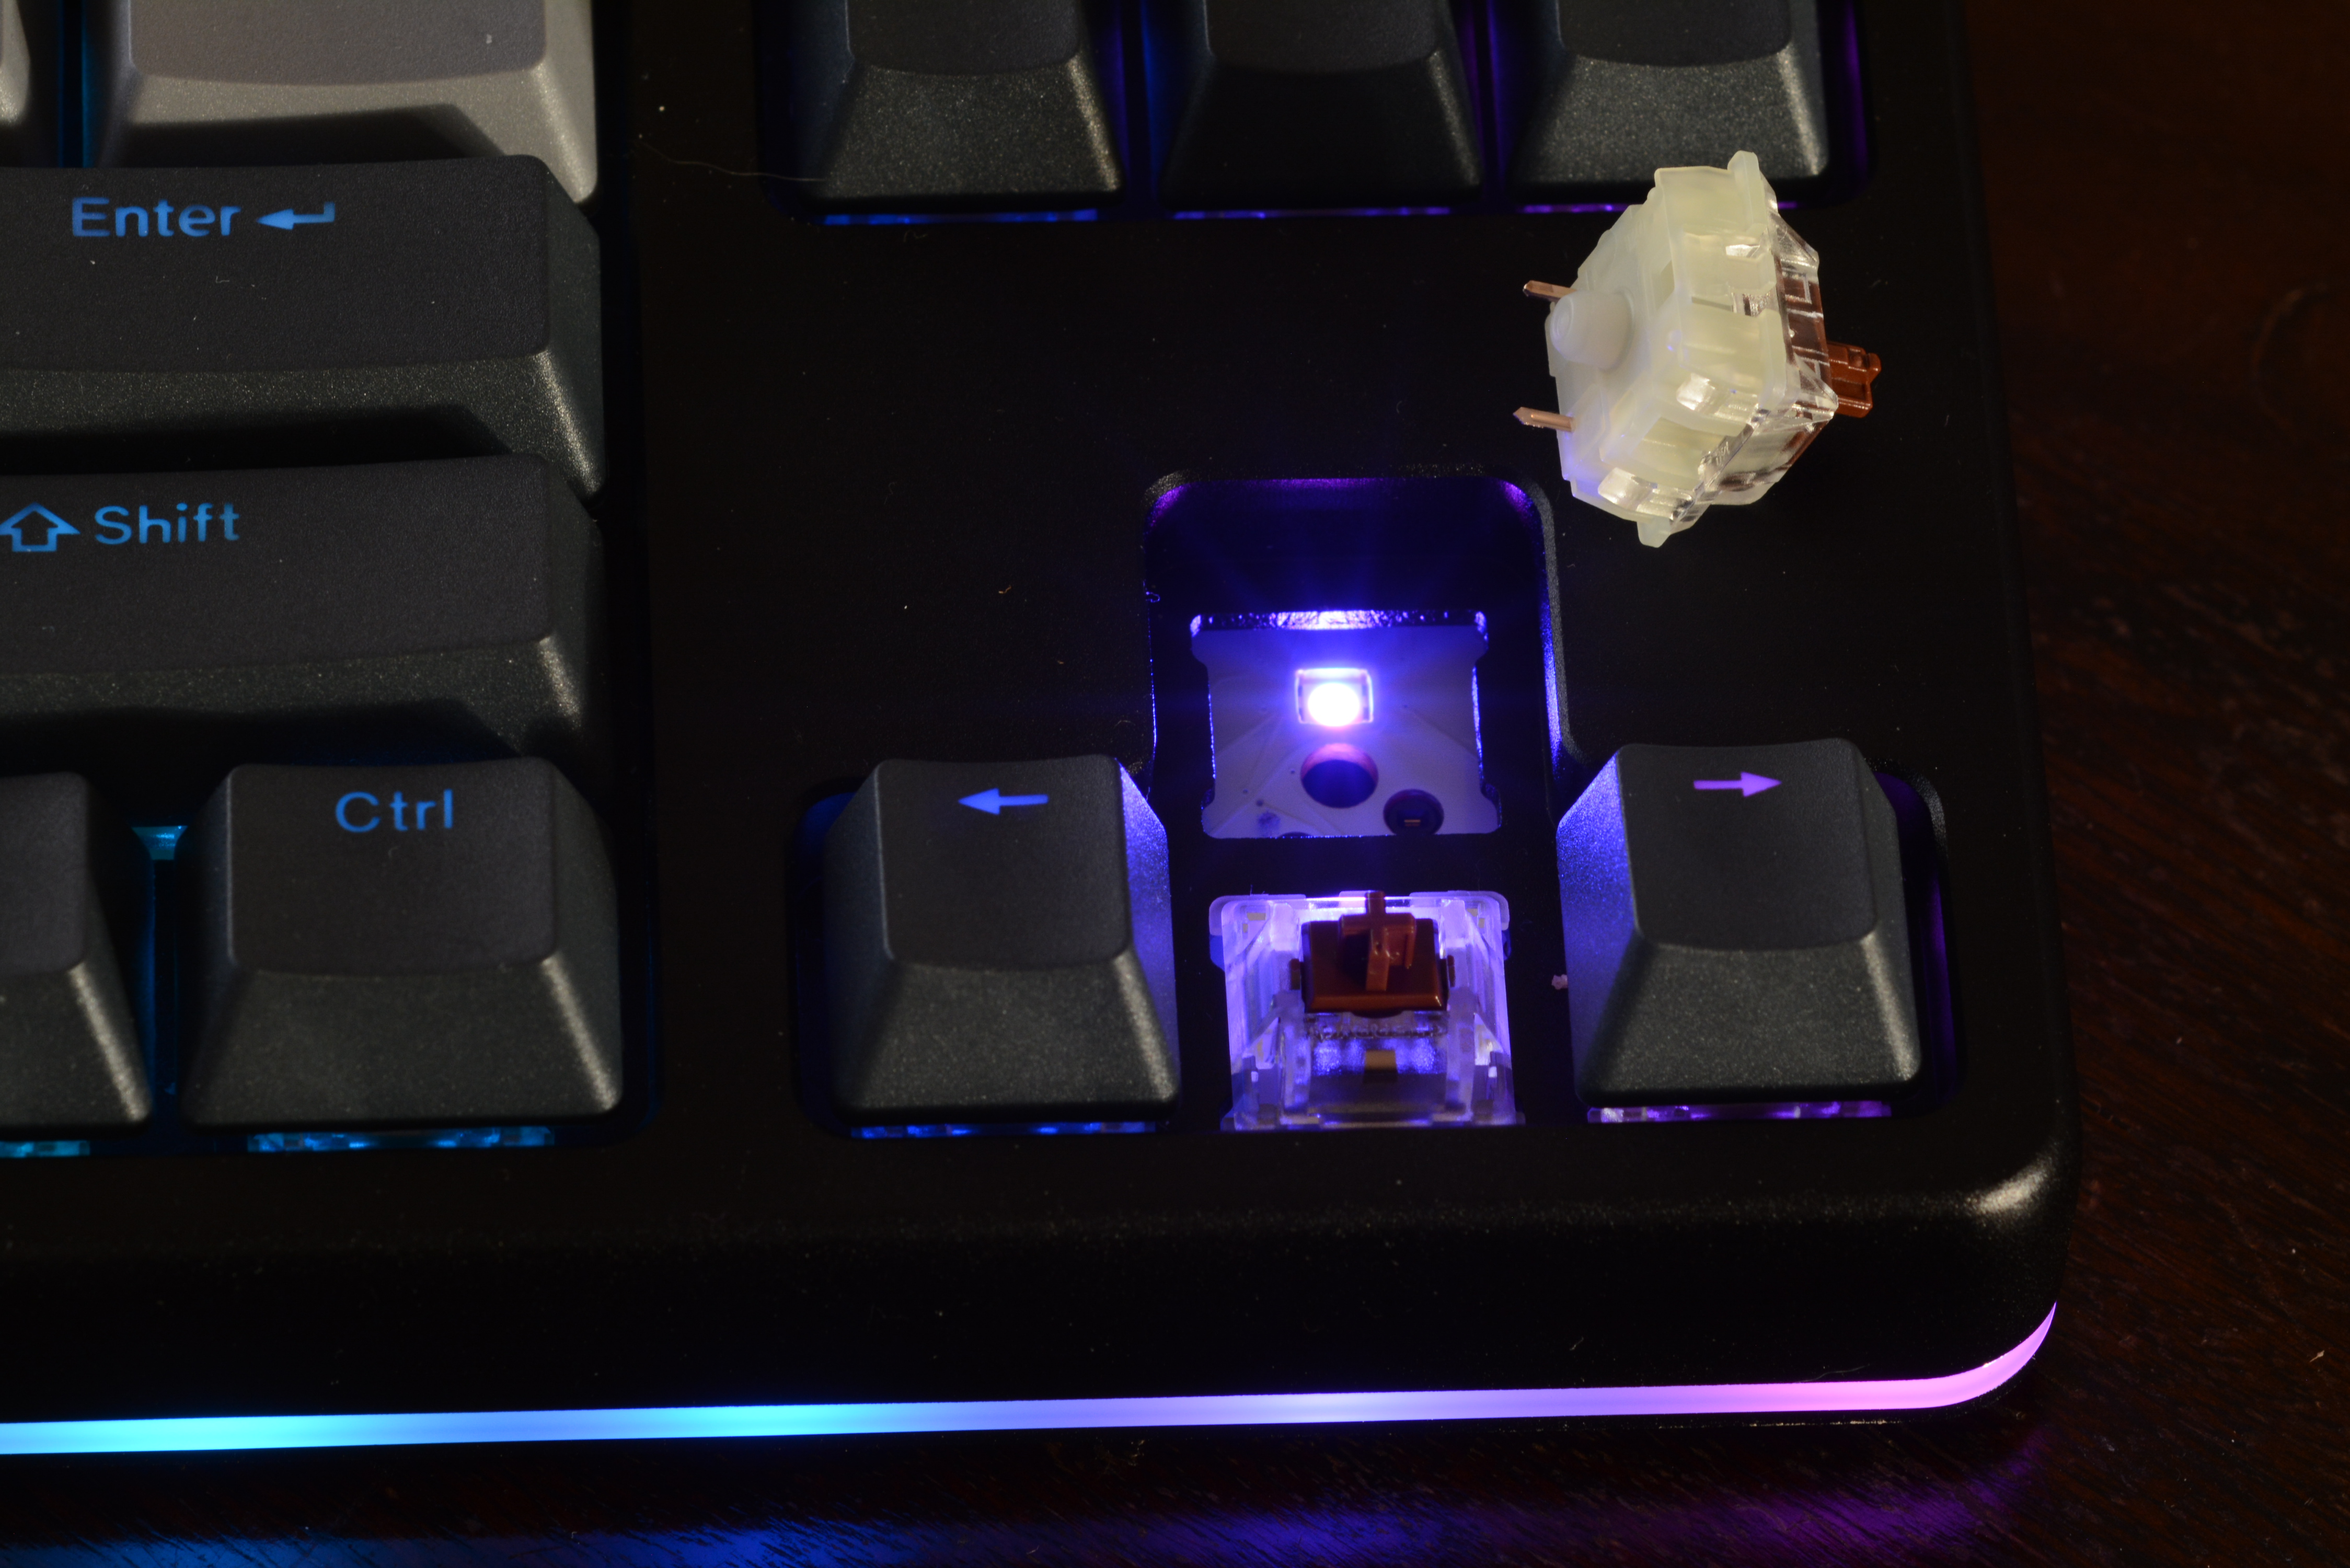
Taking the included keycap puller and removing a few keycaps, you can get a nice look at these switches. Yup, the stem is brown. As these are RGB switches, there is a small hole in the opaque bottom part of the switch housing and the top part is clear plastic, allowing the keycaps to be illuminated.
On many keyboards, the switches are mounted directly on the PCB, the printed circuit board that holds the keyboard's electronics and connects the switches. Other keyboards—such as the CTRL—have a plate above the PCB that holds the switches in place. So then the switches are plate mount. Most switches can do both, but switches intended to be PCB mounted often have two extra pins (in addition to the big one in the middle and the two metal contacts). The CTRL's PCB doesn't have the extra holes to accommodate those, so if you get switches with the extra pins, you'll have to cut those off.
In addition to the CTRL itself, I got a sampler pack with 20 different switches—after all, half the fun of having a mechanical keyboard is to try out different switches. I installed those under the function and number keys. With a regular keyboard that would require soldering the new switches onto the keyboard's PCB (the relatively easy part) after unsoldering the existing switches (the not-so-easy part). Fortunately, the CTRL allows for hot swapping, so you can simply pull out switches using the supplied switch puller, and then push in replacement switches. A hot swappable keyboard is definitely the way to go for someone new to mechanical keyboards, unless you know for sure which type of switch you prefer.
Hearing is believing
What I quickly learned is that, yes, clicky switches really do click, some louder than others. But even though tactile and linear switches are basically silent, that doesn't mean the keyboard as a whole is silent: there's still the sound of the keycaps reaching the end of their travel on the downstroke and/or the upstroke. With the tactile brown switches, I found the somewhat more subdued and more "clunky" than "clicky" sound of the CTRL rather pleasing compared to the sharper sound of most other keyboards. Admittedly, it’s still a bit loud for conference calls. Then again, there is something to be said for the crisp sound and feel of clicky switches like the Kailh Box Navy.
Mechanical keyboard hobbyists (yes, it's often referred to as "the hobby") who are really serious about keeping their keyboard as quiet as possible, or who like the smoothest possible action, take apart and lubricate each switch individually.
N-key rollover
As typing speeds increase, we tend to press the next key before we've completely released the previous one. So keyboards need to support some level of "rollover" and handle multiple keys being pressed at the same time. And when gamers came along, they started to press even larger numbers of keys at the same time.
If you had only a few keys, you'd wire each key switch to a pin on the keyboard controller chip, so each keypress can be registered completely independently. But with more than a hundred keys, this quickly gets out of hand. So keyboards now use a matrix of columns and rows, where each key connects a specific column to a specific row when it's pressed. Suppose we use columns like 1QAZ, 2WSX and so on, and rows like 1234, QWER and ASDF. The controller sends a signal down the columns one by one, and then sees if that signal shows up on any of the rows. Suppose that with a signal on the 2 column, the signal shows up on the Q line. That means the W is being pressed.
With such a keyboard matrix, any combination of two keys pressed at the same time can be registered accurately. Things get more complex for some 3-key combinations, such as Q-W-A. The signal on the 2-column can now travel through W, Q, and A to the A-row, making the controller think S was pressed. Very dumb/old keyboards would simply register such a "ghost" keypress, which could result in a problem like "thje" appearing when typing "the" too quickly.
To avoid such ghosting, keyboards use "blocking", where if the controller sees a keypress that could be the result of ghosting, that key is simply ignored by the keyboard controller. A cleverly laid out keyboard matrix can still allow for many common three or even four or five key combinations. But if the keyboard can't register all possible three-key combinations, it's a "2-key rollover" (2KRO) keyboard.
For typing, 2KRO is almost always just fine, as blocking rarely happens for the alphanumeric keys typed with different fingers. After all, a touch typist isn't going to type W S X at the same time with the same left ring finger. Also, suppose you type T H E and the E gets blocked. But then as you release the T, the E gets unblocked, so you still get "the" as intended.
However, for gaming such blocking can be problematic, hence the need for higher rollover levels. And it doesn't get any higher than N-key rollover (NKRO), where all keys can be pressed and registered at the same time. For NKRO just having a smarter keyboard matrix doesn't cut it; it's usually implemented with a diode for every key that makes each key's signal flow through the keyboard matrix in the desired direction.
NKRO has become table stakes for any keyboards marketed towards gamers, and thus the CTRL supports it. However, you have to enable NKRO explicitly, otherwise you get 6KRO. This is probably because simple USB keyboard human interface device (HID) implementations can only handle six regular keys plus modifier keys such as shift and alt at the same time. In my testing, it looks like current operating systems handle more than six keys at the same time just fine.
 Q and Z swapped to show the profile differenceIljitsch van Beijnum
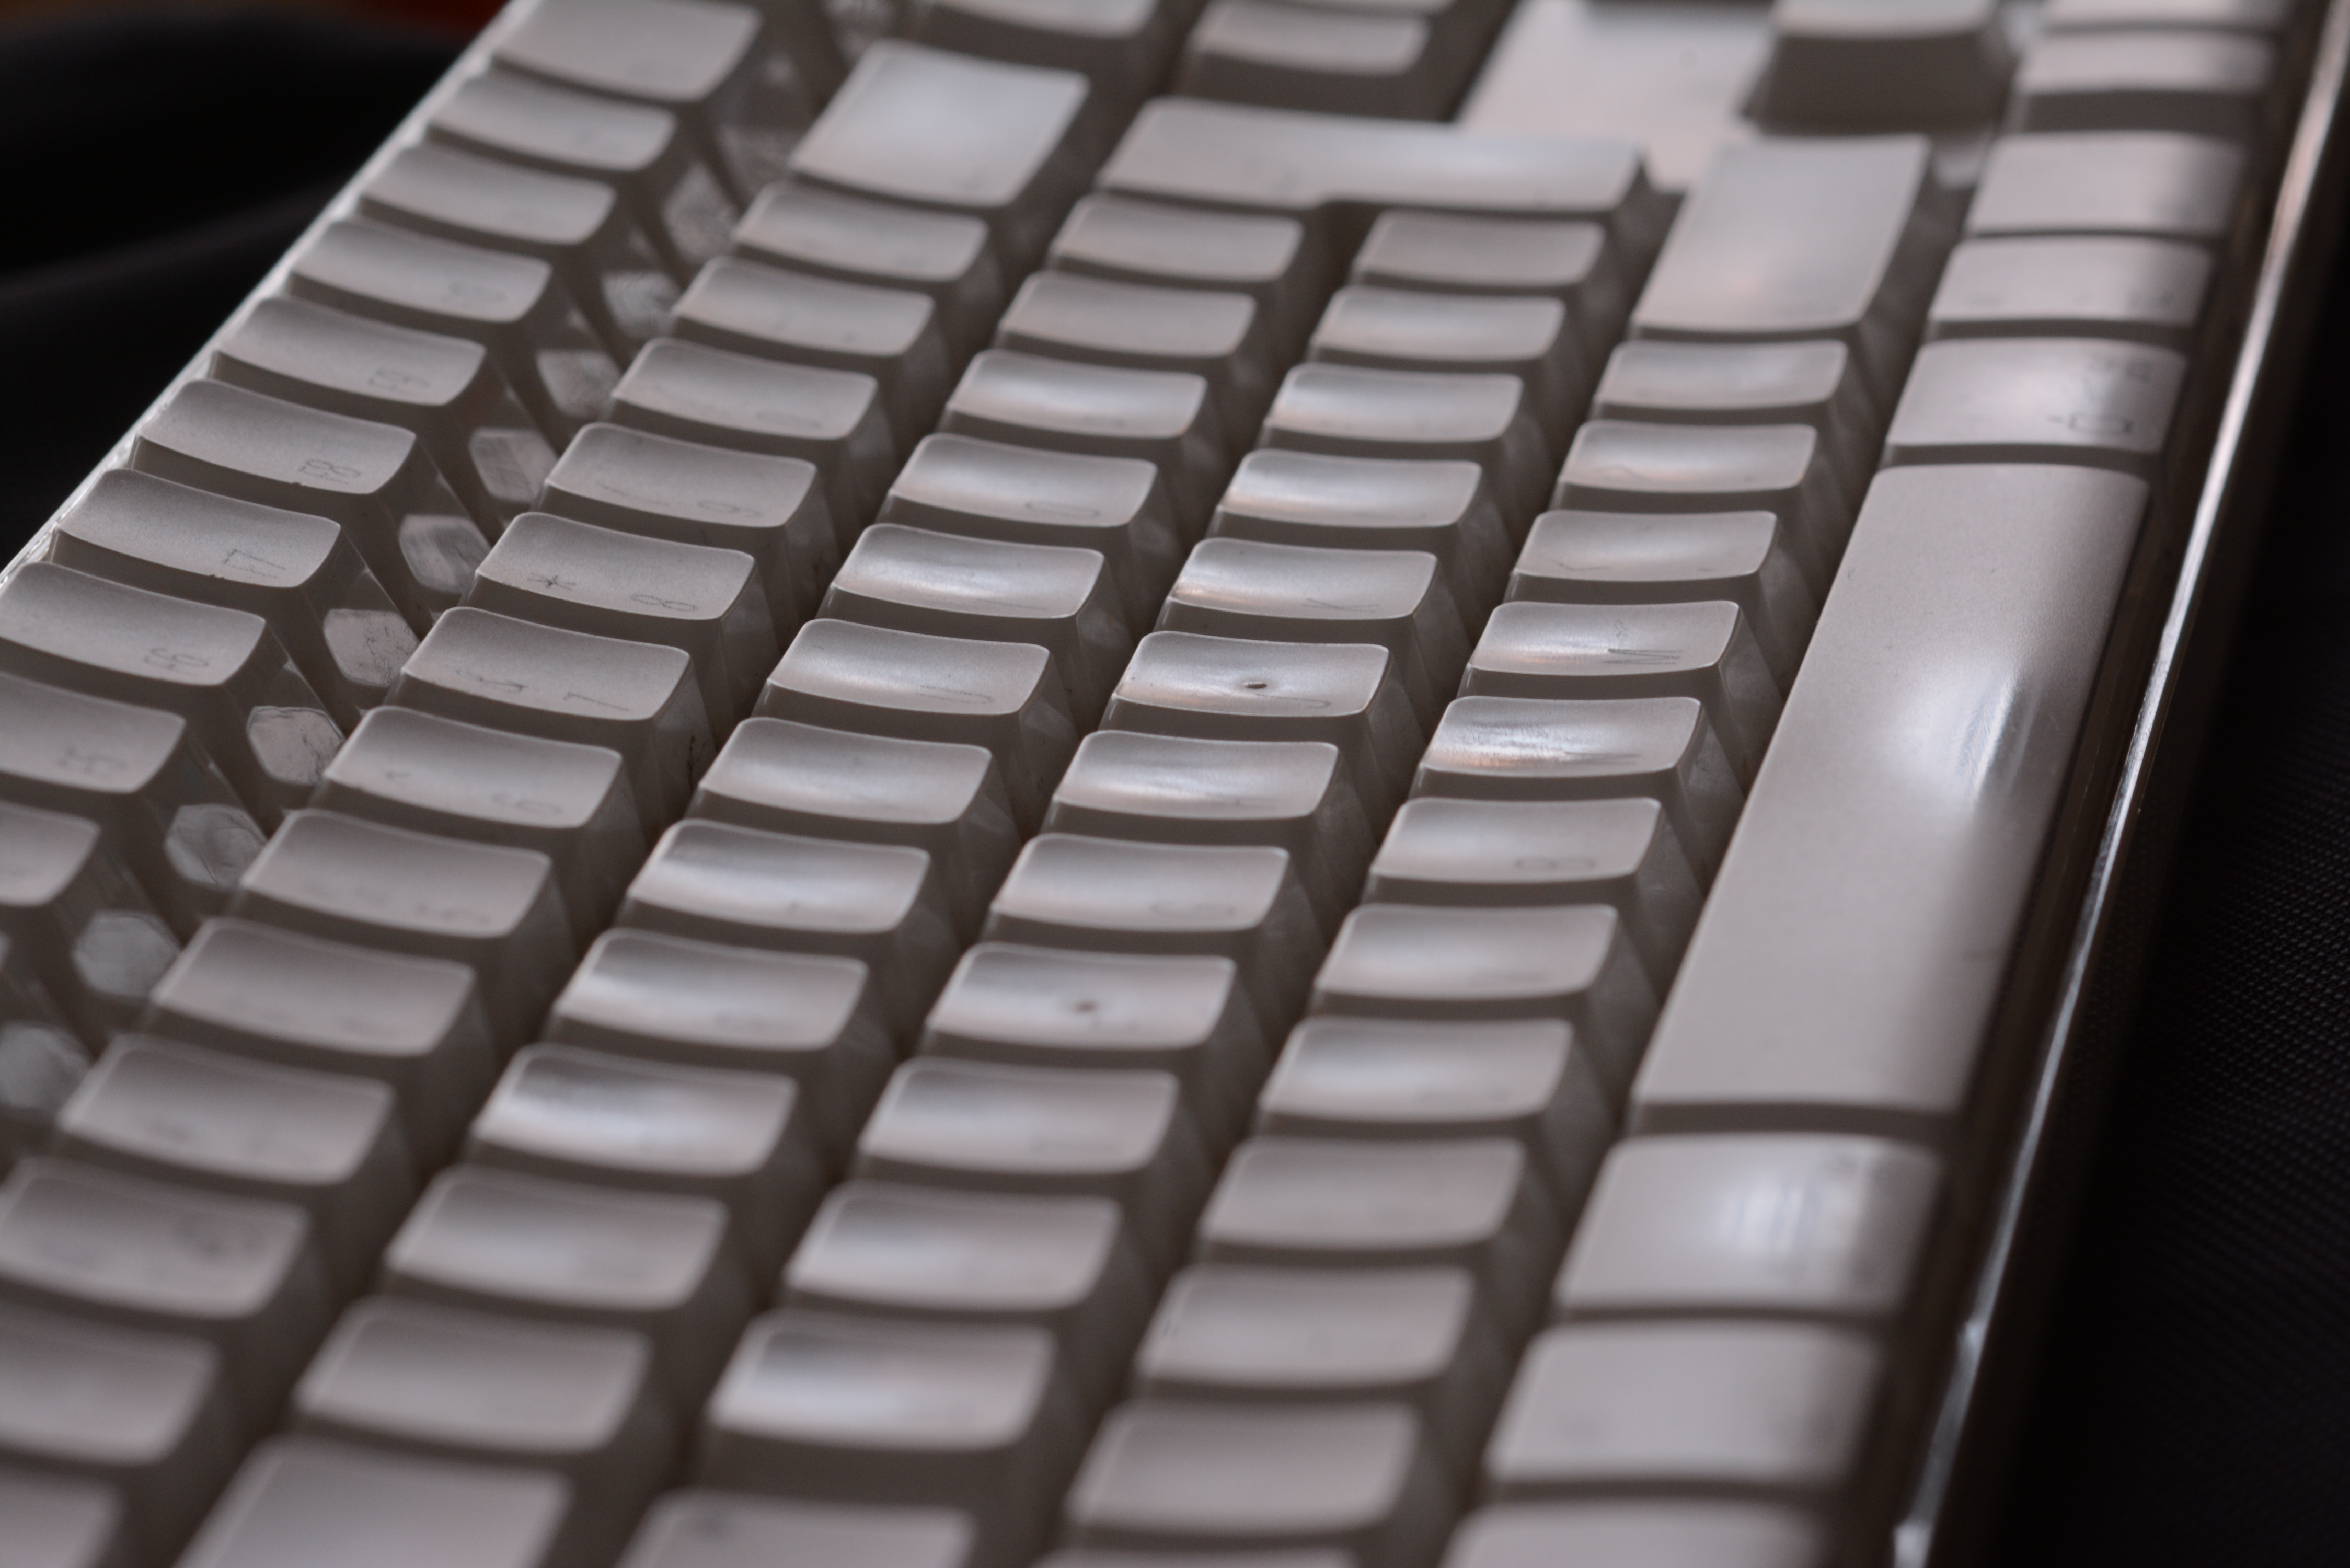 Shiny spots on a 2003 Apple wireless keyboardIljitsch van Beijnum
 Artisanal keycap by tinymakesthingsIljitsch van Beijnum
Keycaps
It can be a lot of fun to play around with different keycaps. They are easy enough to replace, as they're simply pushed onto the +-shaped stem of the switch. A wire-type switch puller sides under the keycaps so they can be pulled out easily without damaging the board or the switches.
Note however that it's not really possible to swap arbitrary keys (of the same size, obviously), as keys on different keyboard rows have different profiles to make them easier to type. The lower rows are usually flatter and the higher ones slope down more. The common "standard" or "OEM" profile uses four shapes for the keys: R1 for the bottom two rows (the spacebar and ZXCV rows), R2 for the ASDF row, R3 for the QWER row and R4 for the number and function key rows.
The same size keycaps with the same profile can be swapped without any issues. So you can swap cursor up and cursor down (both R1), or the escape key and ~` (both R4). But swapping keys like Q and Z means you're swapping an R3 and an R1 profile key, so the swapped keys will feel weird because their shape doesn't match other keys on the same row. But somewhat surprisingly, typing with swapped Q and Z keys didn't bother me. Could of course be because those are two of the least used letters in the alphabet...
When buying keycaps, make sure they fit your keyboard. The CTRL uses the most common key sizes (the same as a standard 104-key keyboard save for the numpad), but smaller keyboard configurations often use less common sizes to make everything fit, making it harder to find keycap sets for those keyboards.
Almost all keycaps are made from one of two types of plastic: ABS and PBT. ABS is more common as it's cheaper. It can be very smooth, and heavily used keys often become even shinier, giving them a somewhat oily look. This is especially obvious when looking at the spacebar for those of us who always hit the same area. However, this has nothing to do with skin oils, just wearing of the material. The shiny parts are actually a bit grippier.
ABS has a tendency to turn yellow over time with exposure to UV light or heat. However, that takes a good number of years and many current ABS keycaps are advertised as UV coated. PBT is harder and often has a coarser feel. It's not entirely immune to becoming shiny, but for PBT this takes much longer than for ABS. PBS is immune to yellowing.
Keycap legends
On cheap keyboards, the legends on the keys are often pad printed. These labels wear off relatively quickly—after a few years for the most used keys. Pad printing isn't normally used for today's mechanical keyboard keycaps as far as I know. A much more durable way to label keys is with dye sublimation, which infuses dye into the key material so the labels won't wear off. Dye sublimation only works with dark legends on light keys. Dye sublimation is no longer in common use, but Unicomp, the maker of new Model M and Model M-like buckling spring keyboards, still uses it.
There are a variety of laser-based techniques for burning labels into keycaps, some of these even allow for light text on dark keys. A very flexible method is UV printing, which is basically done with an industrial type inkjet printer that uses inks that cure almost immediately under UV light. UV printing allows a company like WASD to create keycap sets with custom legends (you can even upload your own designs!) in a variety of key and legend colors at prices not much higher than mass produced keycap sets. You can even order individual keycaps, or replace those Windows keys with ones matching your operating system of choice.
But if you really want to pimp your board, there's no better way than to get one or more artisan keycaps.
Shine-through or not?
The ways to print legends on keycaps mentioned so far all result in regular, opaque keycaps that are incompatible with LED illumination. To light up, the legends need to be translucent or shine-through. One way to make those is with laser ablation, where a laser burns away an opaque layer from an otherwise translucent keycap.
The bee's knees as far as keycap legends go is double-shot injection molding. This is done in two steps: one mold provides the legend for a key, and a second mold the rest of the keycap. Obviously that means the legend won't wear off as long as the key is still in one piece. If the legend material is translucent, this results in shine-through keycaps compatible with RGB backlighting.
As the mechanics of an MX switch occupy the middle, the hole that allows the LED illumination to come through from the PCB below is at the top or north edge. This means that only about the top half of a keycap is illuminated well, and the illumination also drops off towards the sides. For this reason, shine-through keycaps almost always have their legends on the top middle part of the key, rather than the more usual middle or the top left. This is especially noticeable with the number row keys, which say 1! 2@ 3# and so on, rather than have the shifted character above the number as keyboards have done since time immemorial.
Coupled with the fact that on shine-through keycaps really only work well when backlit, there's actually something to be said for using regular keycaps rather than shine-through ones.
Customizing settings and firmware
The CTRL has very few settings: just some for the RGB backlighting and 6KRO vs NKRO. And those are forgotten as soon as the keyboard loses power. There's also no accompanying software. So if you want to change anything about the behavior of the keyboard, you'll have to do so by changing the firmware.
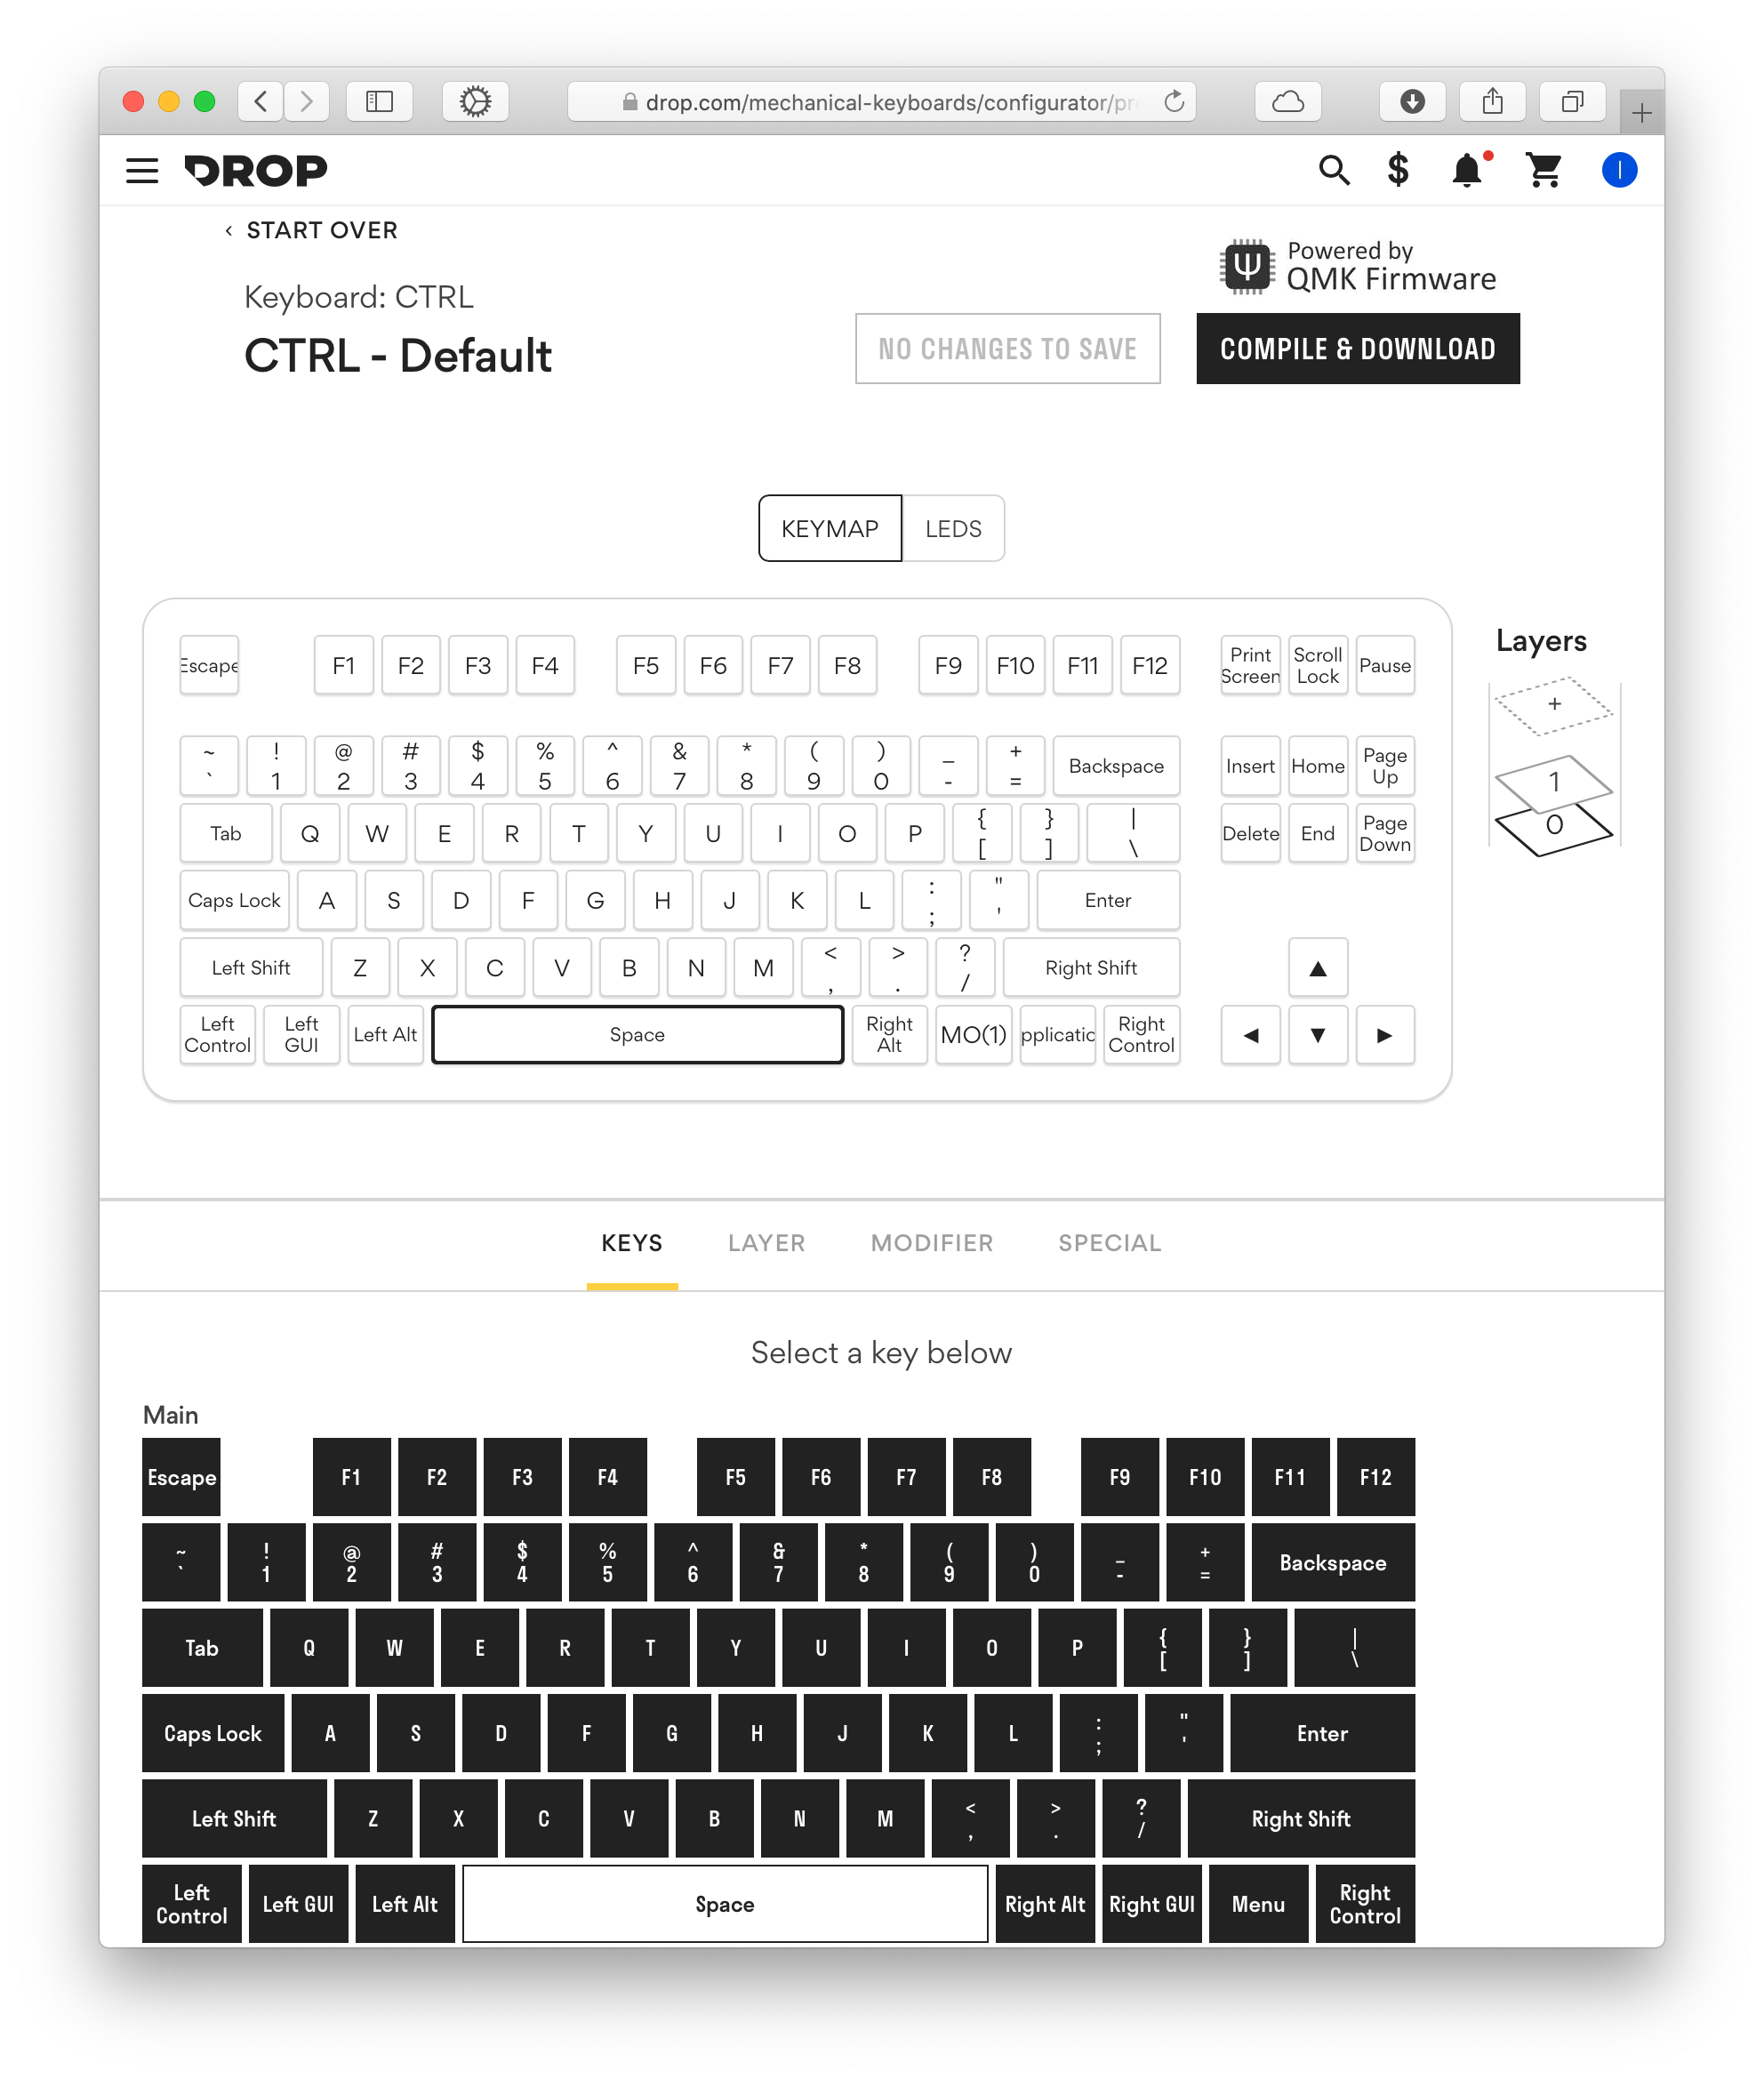
The good thing is that the CTRL uses the open source Quantum Mechanical Keyboard (QMK) firmware. However, you don't actually have to compile new firmware from source just to change some settings; you can also use the Drop's keyboard configurator. With this web tool, you can change which key does what and which LED lights up in which color. You then download firmware with these settings and use a provided tool to flash the keyboard with the new firmware. This only takes a few seconds or so—the firmware files are just over 50 kB. If you make an account, you can even save your layouts and make further changes in the future.
The first thing I did was swap "GUI" (Mac command or Windows keys) with alt. This way, I didn't have to change this in the System Preferences on all the Macs I might use with the keyboard. After that, it was time to learn about layers.
Layers
Layers let you type keys that aren't present on the keyboard, or even switch to completely different keyboard layouts. On the CTRL, holding down Fn activates layer 1, letting you use regular keys to change some settings. I set up layers 2 and 3 without any special key mappings, but with different LED colors. I can change between the default layer 0 and layers 2 and 3 using Fn-0, Fn-2 and Fn-3.
I didn't like the way media control functions were mapped on the CTRL out of the box. So obviously I made the Pause key play/pause media playback, with volume up/down and previous/next track under the arrow keys in layer 1.
Then it occurred to me that in the vi editor using h, j, k and l as the cursor keys works pretty well. So I mapped those keys to the cursor key actions in layer 1. But having to press the Fn key along with those keys is really inconvenient. So what other key could I use to activate layer 1?
I know: the spacebar! My thumbs are hovering there anyway, so that would be super easy. Of course I also need the space bar to, you know, type spaces, but that's not a problem with the Drop CTRL. I just set up the spacebar so a quick tap on produces a space, but holding it down activates layer 1. And to up my Unix street cred, I configured the caps lock key to be caps lock when tapped and ctrl when held.
Tinkering with the QMK source for even more advanced customization is still on my todo list.
Conclusions
Obviously, the Drop CTRL is a really nice keyboard. But is it too expensive? Yes, no, ... and yes. In a world without cheap keyboards, would $200 for a good keyboard make sense? Yes, absolutely. But we live in a world where a perfectly usable keyboard can be had for $20. Those won't last you a decade, but even if you end up buying three or four, that's still cheaper than one CTRL. So in the sense that there's much cheaper alternatives that also get the job done, yes, the CTRL is too expensive.
On the other hand, in a world where people spend twice as much money for a nicer phone, a nicer computer, or a nicer car, spending the money for a nicer keyboard like the CTRL makes sense. You do get a lot for the extra money, such as the nicer typing experience and a lot more customization options. With a keyboard like the CTRL, it's also easier to switch between operating systems. It looks better, sounds better, feels better than most cheap alternatives. So that's extra money well spent in my experience. But... it can be too expensive if the CTRL ends up being a gateway drug to a new, expensive hobby. Tread carefully, my mechanical keyboard friends.
The Good
- Looks and sounds good
- Feels good to type on
- Easy to change keycaps and switches
- Extremely flexible keymap configuration
- Two USB-C ports
The Bad
- Not exactly cheap
- Limited USB-C compatibility
- Low power and low speed second USB-C port
- Few settings can be changed on the keyboard itself and settings can't be saved
The Ugly
- This could become an expensive and time-consuming hobby
Listing image by Iljitsch van Beijnum
https://ift.tt/38dbb2u
Technology
Bagikan Berita Ini


0 Response to "Typing my way down the mechanical keyboard rabbit hole with the Drop CTRL - Ars Technica"
Post a Comment